Converting Standard Sheet Music in a PDF File into Clairnote Notation
In the previous post we showed how you can create Clairnote sheet music “from scratch”, or from a standard MusicXML file, by using MuseScore, Frescobaldi, and LilyPond. But what if you have a PDF file that contains standard sheet music that you want to convert into Clairnote music notation? In this post we will show you how to do that by:
- Automatically converting the PDF into a MuseScore or MusicXML file
- Making corrections with MuseScore
- Converting the music to Clairnote notation using Frescobaldi and LilyPond
- Making some additional corrections and tweaks
For converting a PDF file into an editable sheet music file, we will discuss two options:
- MuseScore’s PDF import feature that involves uploading a PDF to the MuseScore website where it is converted into a MuseScore file (.mscz).
- Audiveris, a free software application that runs on your computer that can scan a PDF file and export the score in MusicXML format (.mxl).
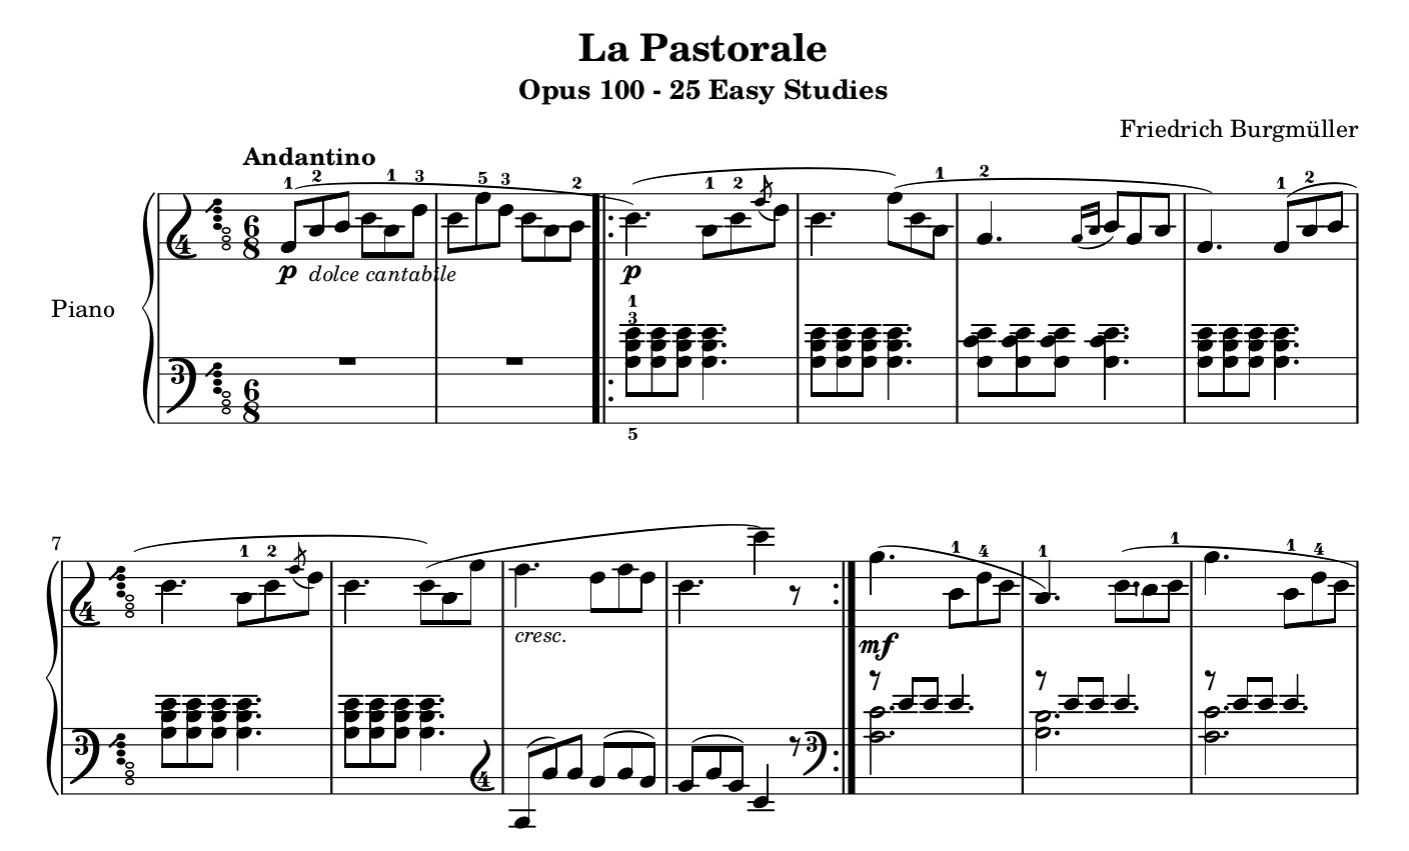
As an example score we will be working with a piano piece written by Friedrich Burgmüller called La Pastorale. In particular, we will be using the PDF file from the Mutopia Project. (Of course, sheet music from the Mutopia Project is already available in LilyPond format, which makes it easy to convert to Clairnote, but we’ll pretend we only have access to the PDF.)
MuseScore PDF Import Service
As we saw in the previous post, MuseScore is a graphical sheet music editor for creating scores. In MuseScore you can go to “File” > “Import PDF” to begin importing a PDF file. This will redirect you to MuseScore’s website, where you will need to log in. Then you will be able to upload a score as a PDF file and download a MuseScore file (.mscz) for that score. For La Pastorale, our example score, the result looks like the following.
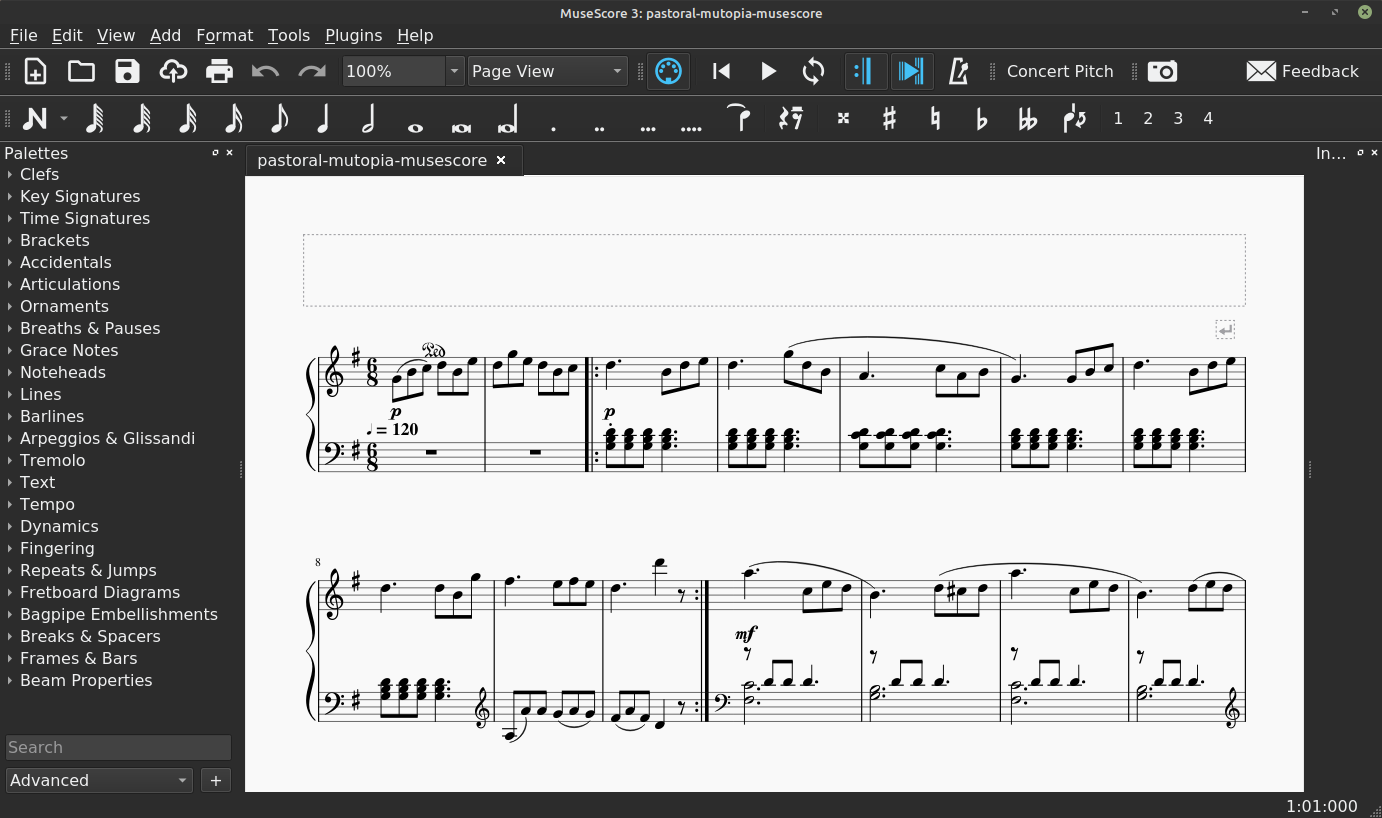
We found that this result was a little better than the one we obtained with Audiveris (discussed below). The funny thing is that MuseScore’s service actually uses Audiveris “behind the scenes” to scan and convert PDFs. Feel free to use MuseScore’s service instead of Audiveris itself. However, we think it’s useful to be able to use Audiveris from your computer, since you don’t need an internet connection once Audiveris is installed. Another benefit of using Audiveris is that it allows you to inspect and manually improve the results before generating a MusicXML file, and it can also work with image files (e.g. JPEG, PNG).
Audiveris
Audiveris is an application for optical music recognition that is free software. It is available on Windows, Mac OS, and Linux. You can check Audiveris’ handbook to see how to install it.
Installing on Windows is very simple, as they provide an installer (.exe). The only other thing you need is a Java Runtime Environment with at least Java 11.
Installing on Mac OS and Linux is more complex, because you have to build Audiveris from its source code. You will need to install a Java Development Kit, either OpenJDK or the Oracle JDK. Additionally, you will have to install Git and Tesseract OCR before building Audiveris. It is all explained in the Audiveris handbook.
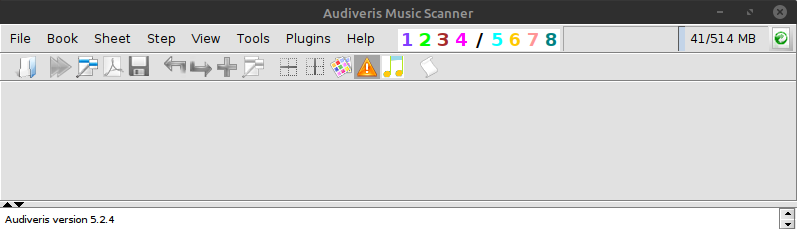
Once you have installed Audiveris you can use it to convert scores from PDF format to MusicXML format (.pdf to .mxl). After opening Audiveris you will see a window like this:
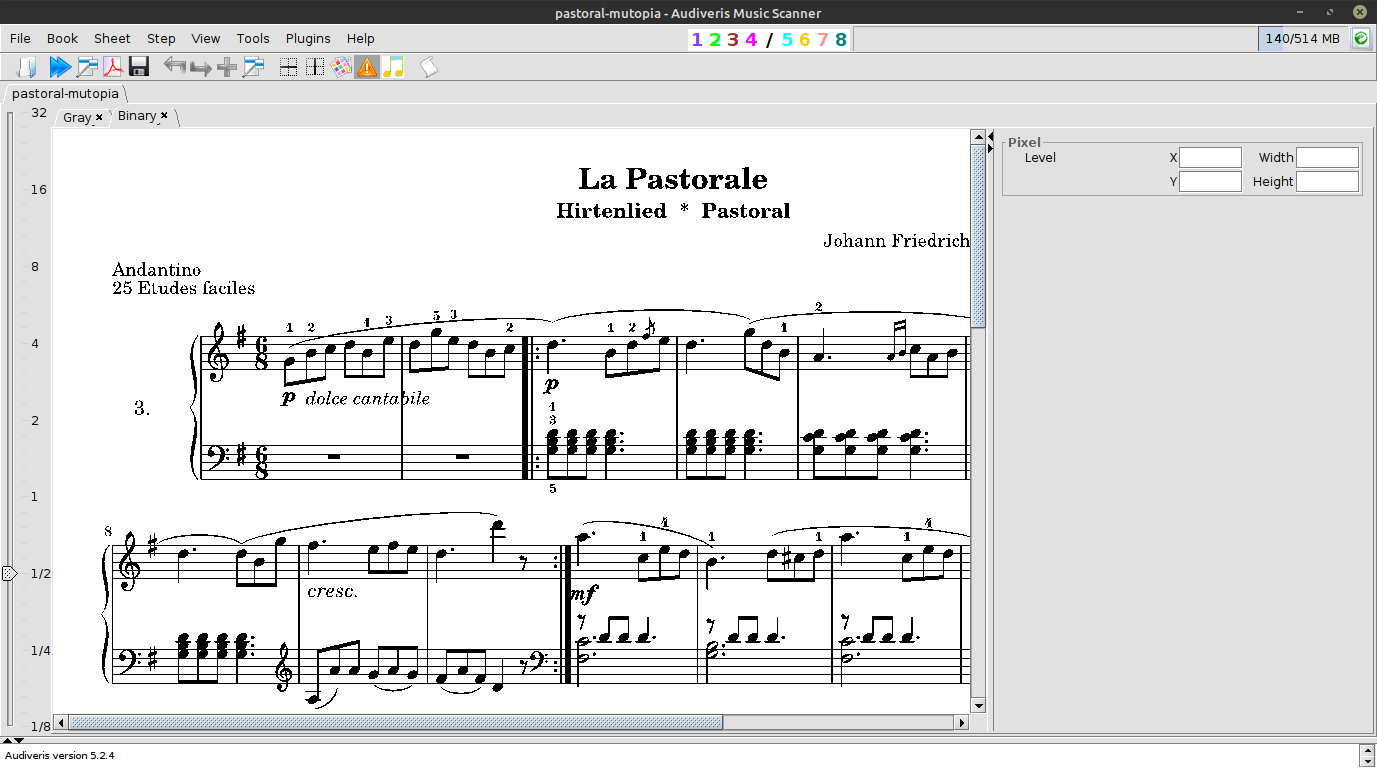
Now, we will see how to import a score and process it. Click on “File” > “Input” and select a PDF file. Note that Audiveris can also import image files in formats like JPEG (.jpg) and PNG (.png). For our La Pastorale example score you should see something like this:
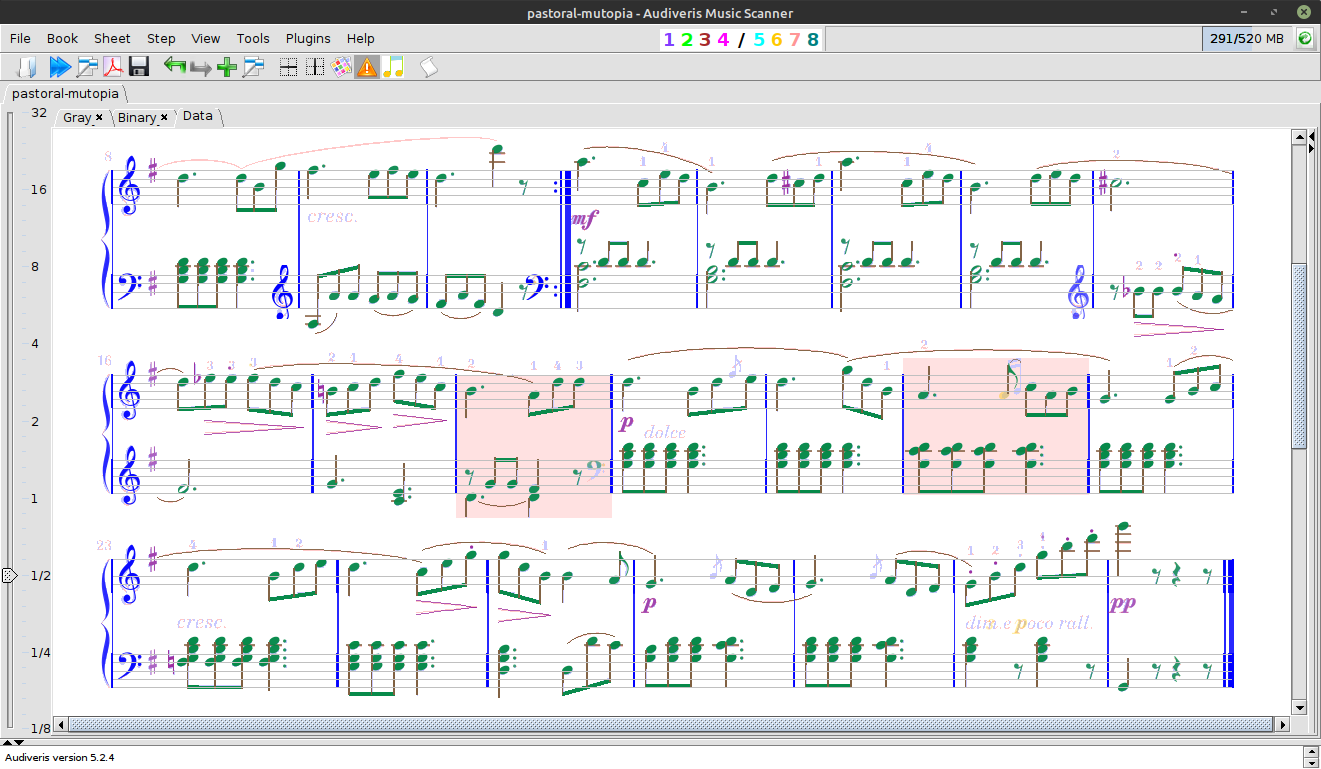
To analyse the score, click on the second icon at the top, starting from the left (the two blue triangles). Audiveris will start to work, and after a few moments a new “Data” tab will appear:
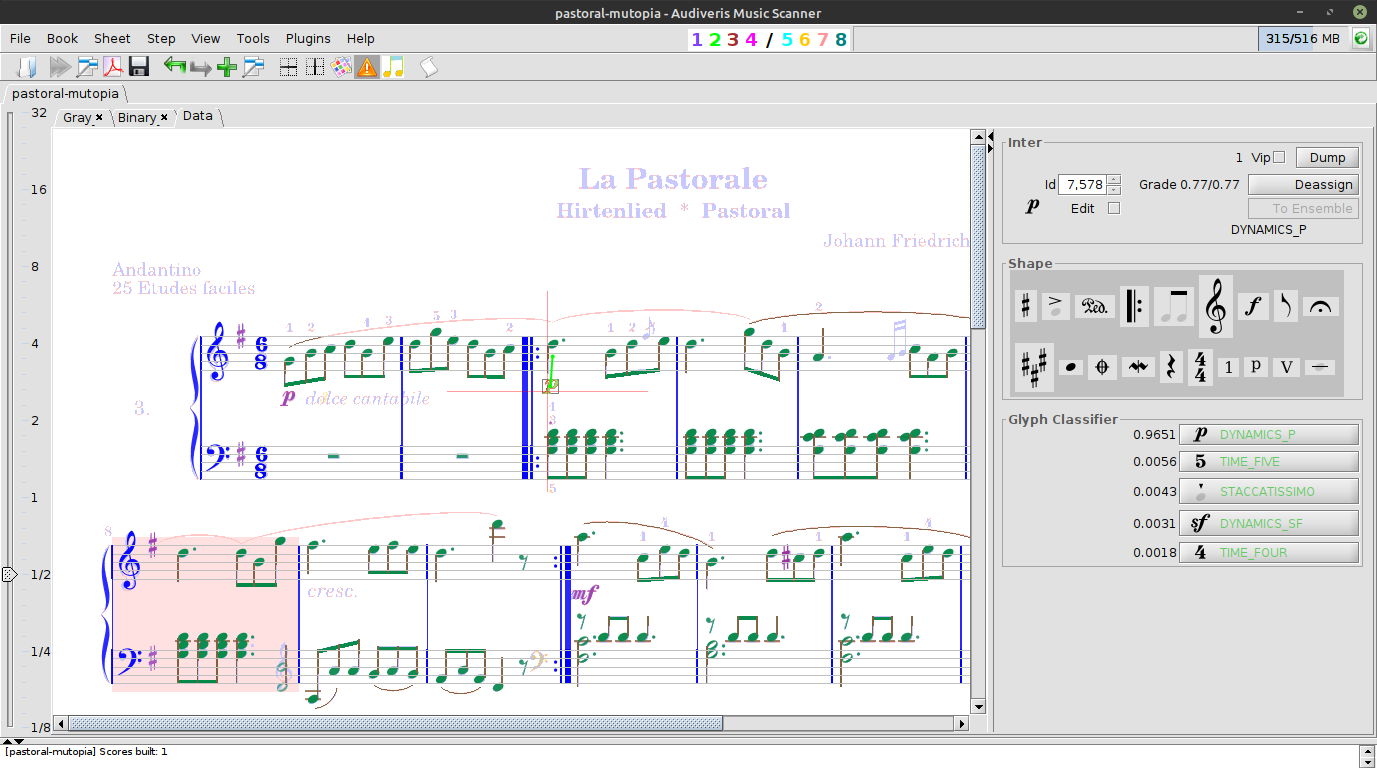
The colored elements are the ones that Audiveris has identified. At first glance, it seems that the score has been properly read. But if you look closer you will see some misread symbols. For example, in measures 3 and 5 grace notes are not identified. Other elements that are not identified include the fingering digits, some of the slurs, and the staff text elements (like “cresc.”).
These are not big problems since we will be able to fix all of them later with MuseScore, but there are some other misreadings we should go ahead and fix.
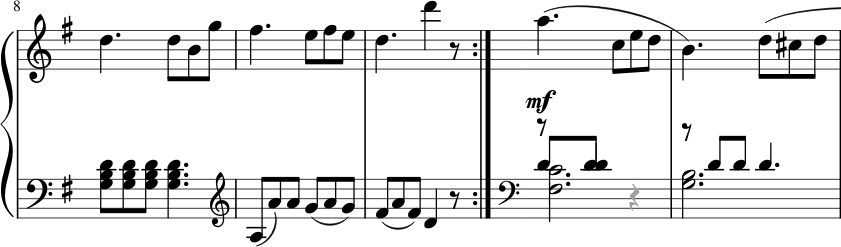
Misread Clefs
Look at measure 8, colored in red. On the lower staff toward the right we can see two half notes on top of the original treble (G) clef. These are not real notes but notes that Audiveris has incorrectly identified. To delete them, select them with a rectangle by clicking with the left mouse button while pressing “Shift”, and press the “Delete” button (or “Supr” button on a Spanish language keyboard). Then, to correctly identify the G clef, select the symbol with a rectangle and look for the “Glyph Classifier” in the panel on the right side. Here you should see several symbols that are the ones Audiveris thinks are similar to the selected one. You should see a treble (G) clef, so click on it. Now you will see that the selected treble (G) clef on the score is displayed in blue, which means that Audiveris has now correctly identified it. Alternatively, you can search in the “Shape” box for the treble clef (or whatever symbol you want), clicking on the different symbols to open different palettes. For example, clicking on the treble clef you will open the clefs palette.
Similarly, two measures ahead there is a bass (F) clef which is not identified on the bottom staff. Hence, repeat the same steps to identify it as a bass clef. The same error occurs in the measure below (number 18).
Misread Grace Notes
In measure 21 only part of a grace note has been identified. To fix this, and any errors like it, just select and delete the colored (identified) symbols.
Now go to “Book” > “Export Book as” in order to export the score in MusicXML format (.xml). Next you can import and edit the MusicXML file in MuseScore, which we recommend for most people. (Alternatively, if you prefer working with LilyPond files you could import the MusicXML file directly into Frescobaldi and edit it as a LilyPond file.)
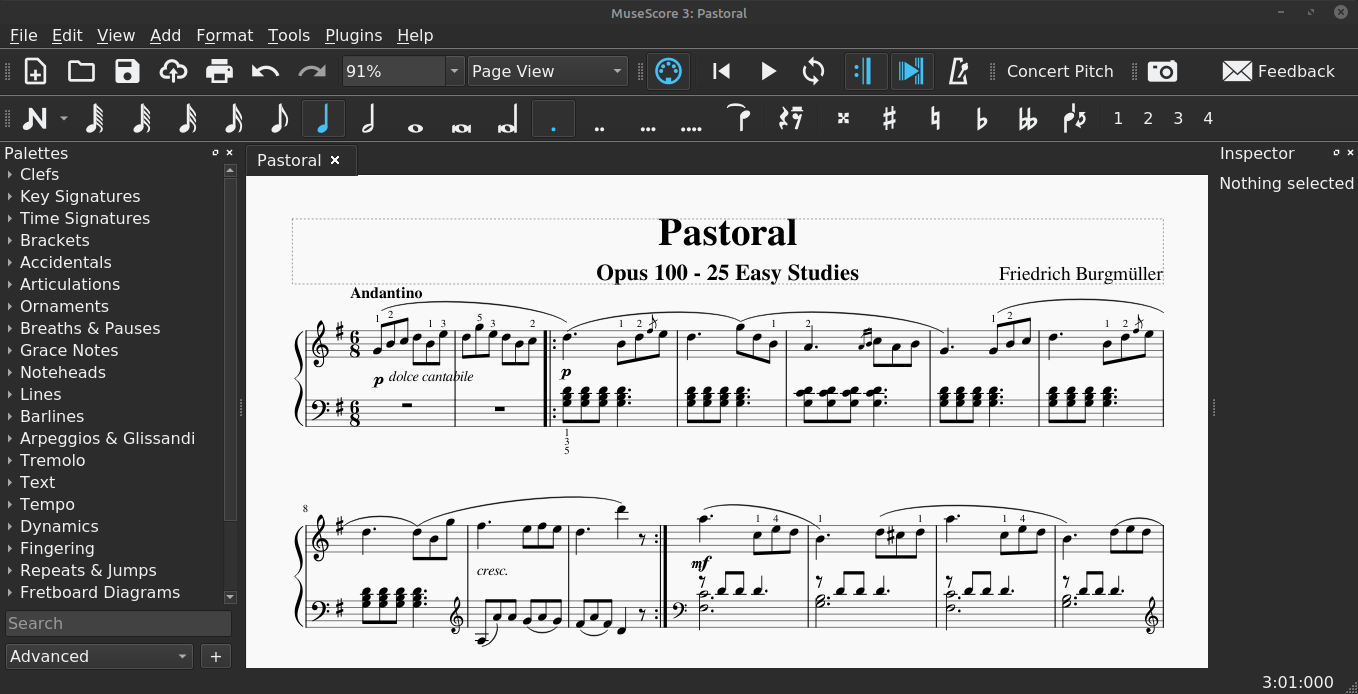
Editing the Score with MuseScore
In MuseScore click on “File” > “Open”, and select the MusicXML file (.xml) that you exported from Audiveris. You should see something similar to this:
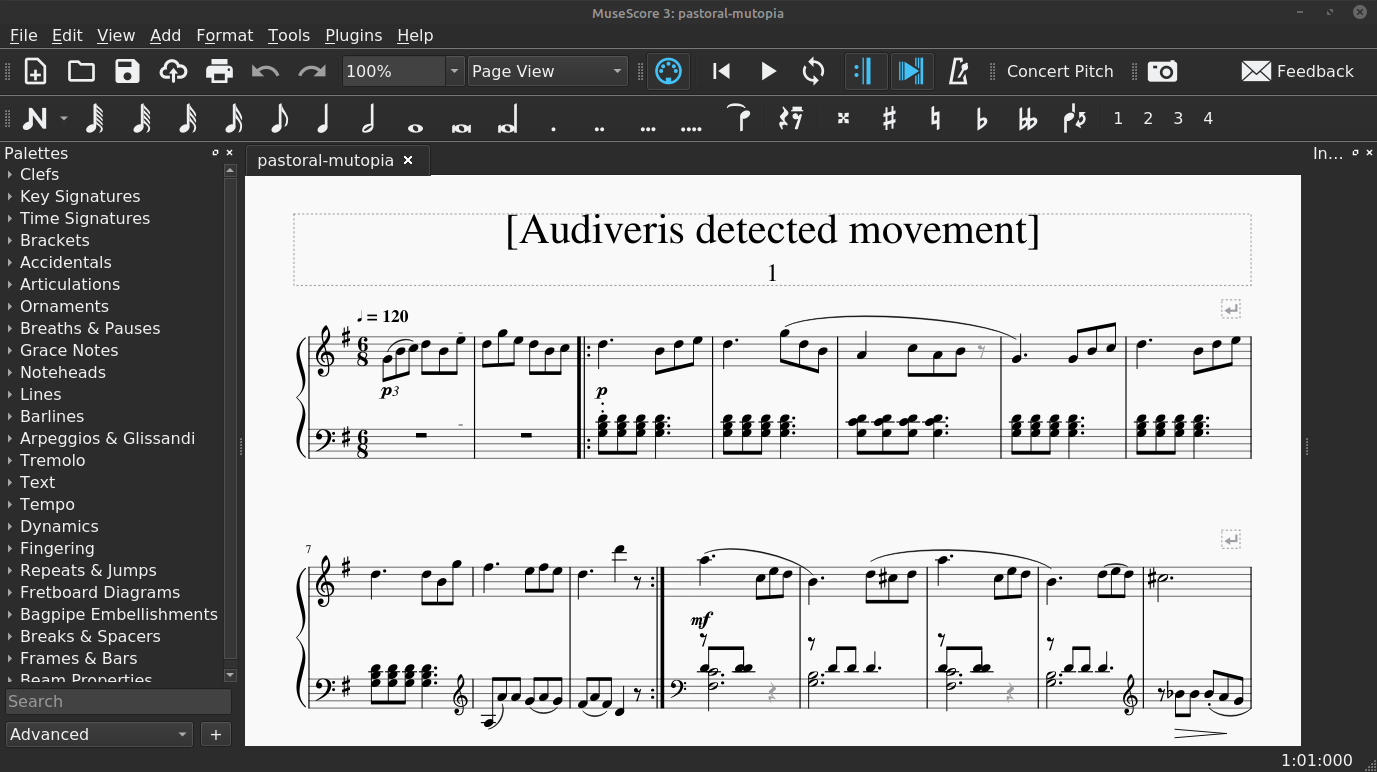
Well, it’s not bad, but there are some differences from the original score in the PDF file. Next, we’ll find the differences and correct them. By the way, you can now save this file in MuseScore format (.mscz).
Title, Subtitle, and Composer
First of all, we will start with the title. Select the text “[Audiveris detected movement]” and replace it with the desired text (in this case, “La Pastorale”). Then select the number “1” below, which is the subtitle, and replace it with “Opus 100 – 25 Easy Studies”. Now, what about the composer? Select “Add” > “Text” > “Composer” and type “Friedrich Burgmüller”.
Layout Breaks and Tempo
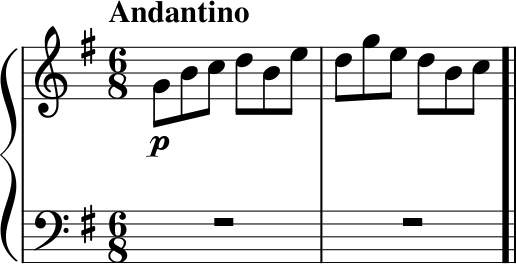
Before going to the score itself, look at the rectangles with an L-shaped arrow just above each staff on the right. They are layout breaks, but we don’t want them to be there, so delete them all. Now let’s go to the score. Select the tempo text above the first bar, and replace it with “Andantino”.
Misread Note Durations
Now look at the first three notes (shown below).
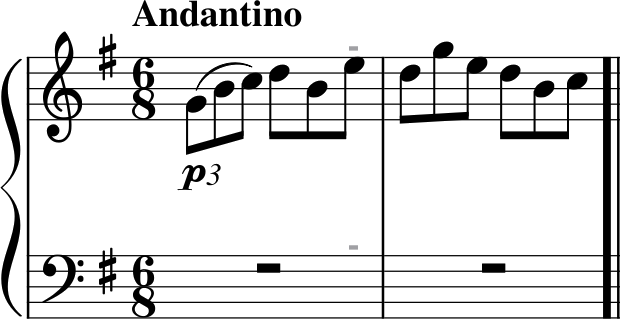
They are treated as a triplet (as they have a slur above and a “3” below). Select them with the cursor (you can select the first note and then the next ones by pressing “Shift”) and delete them pressing “Delete” (or “Supr”). You will see a quarter rest. But it should be a dotted quarted rest! The key is the little gray bars just above both staves at the end of the bar. This means that the bar has a different duration than what is specified by the time signature. So select one of the two bars (either from the top staff or the bottom one), right click on it, and click on “Bar” > “Bar Properties”. You should see the following dialog.

Go to “Bar Duration” and change the value in “Actual” to “6”. Plus, uncheck the option “Exclude from bar count”. After clicking “OK” a quaver (eighth) note will be added to the end of the bar.
To fix the position of the notes, select the three remaining notes, copy them (“Control” + “C”), and delete them. Then select the first quarter rest and add a dot to it (click the dot symbol on the top panel below “Page view”, or just press the period (”.”) button on your keyboard). Select the first of the three remaining quaver rests and paste the three notes you previously copied (“Control” + “V”).
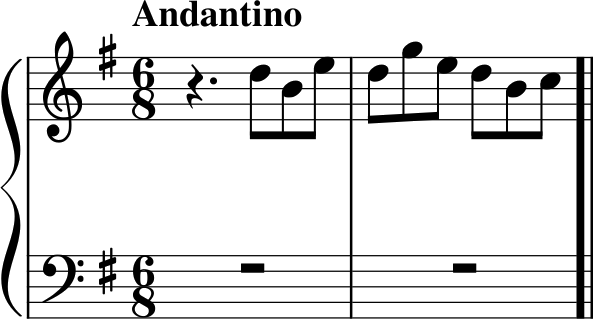
Finally, we only have to add the three first notes. Select the quaver note symbol on the top (or press the number “4”) and click on the first symbol on the top left which has an N-shape (or press “N”). Then click on the bar at the G line on the staff, and do the same for the B and C notes. Finally, add the piano indication (“p”) to the first note (using the “Dynamics” palette).
This same problem happens in the penultimate measure, and a similar one occurs in measure five, due to a misreading of the dot of the first note. Just copy the last three notes, delete them, add the dot to the first A note, and then paste the last three notes just after the A note. Then it should look like this:
Also look at the third measure. Just below the piano text (“p”) there are two dots; delete them.
Missing Grace Notes
Now look at the last note of the third measure on the top staff. There is a grace note missing. To add it, click on the “Grace Notes” palette on the left side, and add an acciaccatura by dragging it to the last note.
Similarly, in measure five there are two grace notes to add, just before the C quaver note. Just do the same thing but drag the acciaccatura twice. Then select the grace notes and change them to semiquavers (sixteenth notes) by pressing “3”. Now, having learned this, repeat the same procedure to add all of the grace notes that are missing from the score.
As you see, this is a laborious work, but it is still faster than writing the whole score from scratch. Let’s continue.
Incorrect Bar Line
Go to measures 8 and 9 and look at the bar line. Strangely, it is not shared between both staves, as you can see here:
To fix this, just double click the bar of the top staff, click the lowest square and drag it down until the line reaches the bottom staff.
Incorrect Notes
Now go to measure 11 just after the the repeat bar. The notes of the left hand (bottom staff) are not correct and neither are the ones in measure 13. Delete those incorrect measures (11 and 13) and then select all of measure 12 and copy and paste those notes to measure 11. Change the position of the notes to the original positions of the notes in measure 11. Then copy the notes of measure 11 to measure 13. The result should look like this:

Misread Slurs
Now a minor error: look at the D notes in the top staff in measure 14. They should have a slur but they have a tie instead. So delete it and add a slur (using the “Lines” palette). Once you add it to the first D note, click “Shift” + “right arrow” to extend it to the proper note (the first D note in measure 16). By the way, with these steps you can add all the slurs that are missing from the score.
Missing Text
Let’s go back to the beginning of the score:
In the original sheet music there is an expression text which says “dolce cantabile”, which was not identified by Audiveris. To add it unroll the “Text” palette and drag the expression text (“Expression”) to the second note of the first measure. Similarly, you can add the text “cresc.” in measure 10, “dolce” in measure 19, “cresc.” in measure 23, and “dim. e poco rall.” in measure 28. And speaking of text, in measures 23 to 26, in the bottom staff, there are some pedal symbols which should not be there, so you can remove them.
Non-Visible Rests
Now another minor error: in measure 18, just after the bass clef there is a quaver (eighth) rest which is gray instead of black:
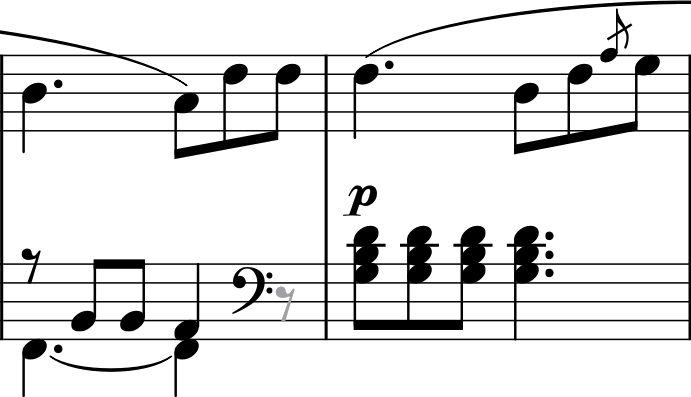
This means that it won’t be shown when exporting the score to a PDF file. To prevent this click on the rest and then check the option “Visible” in the “Inspector” on the right side of the window. Now the position of the bass clef seems a bit odd, so delete it and add it again but in the correct place, dragging it from the “Clefs” palette to the next measure.
Misread Staccato Dots and Missing Fingering Digits
Okay, we are almost done. The only things left with respect to the original sheet music are the fingering digits and some staccato dots that should be removed. Look at measures 15 and 16:
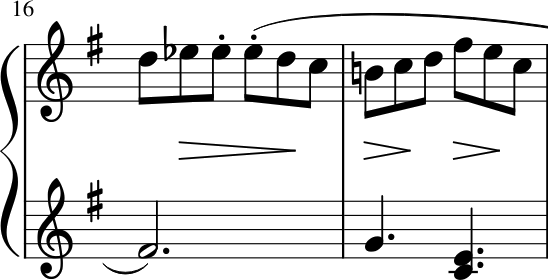
The notes in these measures contain three dots that should not be there, so remove them. Now, as for the fingering digits, if you want you can add them with the “Fingering” palette.
Score Properties
Finally, we should also modify some metadata that the file contains. Go to “File” > “Score Properties”. The following window will pop up.
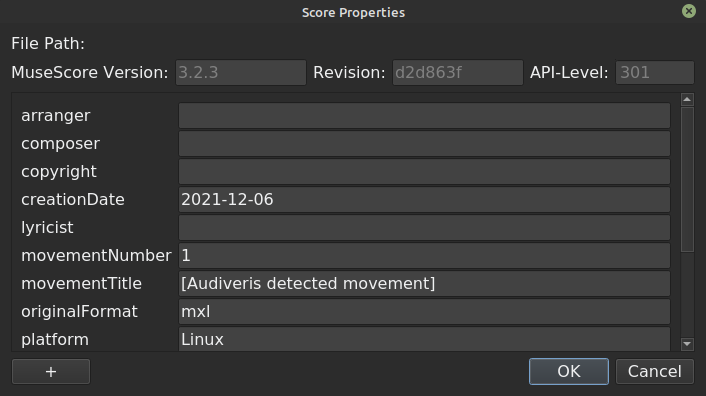
Here you can modify various information about the score that will be saved in the file. You can see that in the value for “movementTitle” is “[Audiveris detected movement]”, which was the text that appeared as a title when we imported the score to MuseScore. In order to avoid future problems in Frescobaldi, delete the text. You can also delete the “1” for “movementNumber”.
And that would be all. If you have followed all the steps, you should end up with a score similar to this:
Once you have finished editing the score, select “File” > “Export” and save the score in compressed MusicXML format (.mxl).
Converting to Clairnote with Frescobaldi
To convert our sheet music to Clairnote we need to take the MusicXML file we exported from MuseScore and convert it into a LilyPond file. An easy way to do this is to use Frescobaldi, an editor for working with LilyPond files.
In Frescobaldi click on “File” > “Import” > “Import MusicXML” to open the score. A window like this will appear:
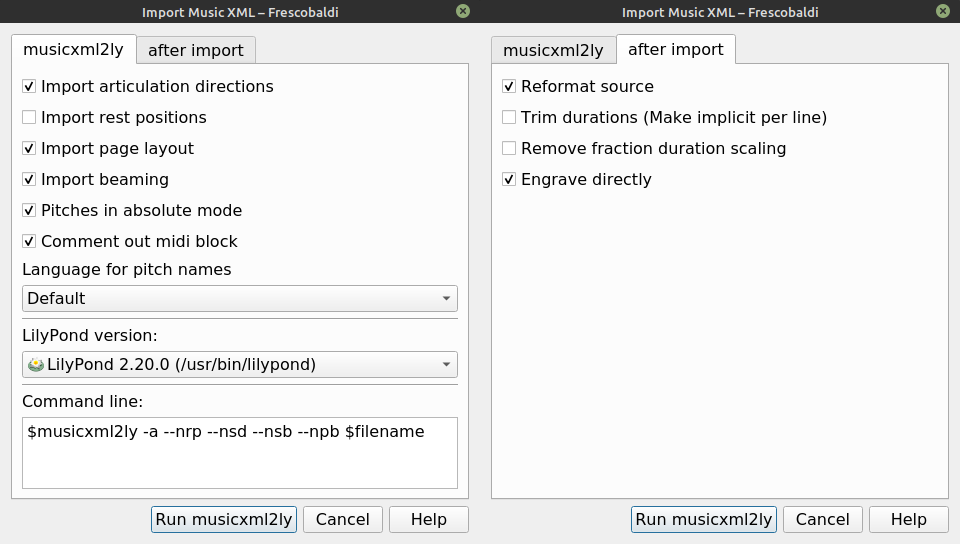
Generally, you should use the same options shown in the image above.
Note that, in the “Command line” box, at the bottom, we have added the text
--nrp --nsd --nsb --npb. (See the
previous post
for more details, and also LilyPond’s documentation for
musicxml2ly.
Frescobaldi uses musicxml2ly to import MusicXML files.)
Click the “Run musicxml2ly” button and you will
see the music displayed in traditional notation, like in MuseScore.
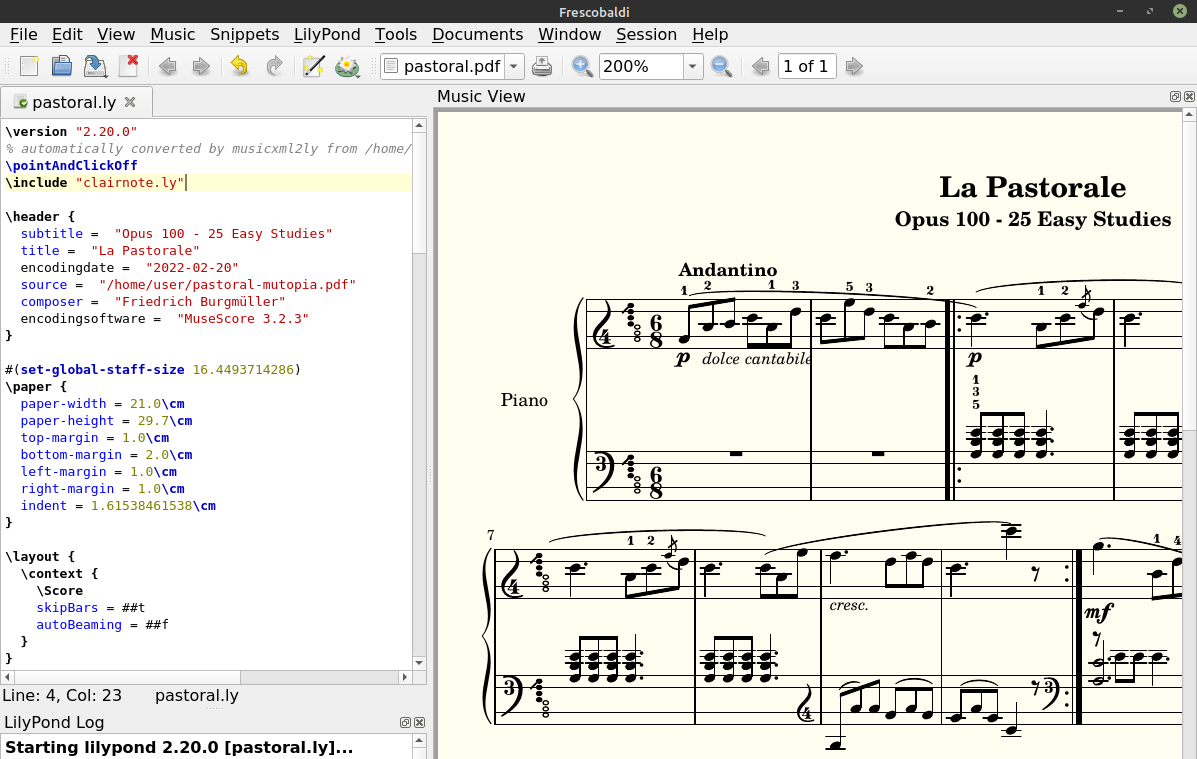
To display the score in
Clairnote SN notation, just add the line \include "clairnote.ly", save the
file, and click the water lily button to render it using LilyPond. That’s it!
Tweaking the appearence of the score
As we saw in the previous blog post, the resulting Clairnote sheet music should
be fine, but
there are still some minor details that can be changed to make it look better.
In order to make things easier, the first thing you should do is comment out
the line \pointAndClickOff (that is, just put ”%” at the beginning of the
line). (See the
previous post
for more details.)
\header and \paper Variables
We’ll start with the \header section of the LilyPond file. In order to remove
the last line at the bottom of the page
(starting with “Music engraving by LilyPond 2.20.0”), you
should add the variable tagline and assign "" to it. Your \header section
should look like
the following:
\header {
  title = "La Pastorale"
  subtitle = "Opus 100 - 25 Easy Studies"
  composer = "Friedrich Burgmüller"
  tagline = ""
}
Just below the \header section, we recommend using the following values for
the variables for the \paper section:
#(set-global-staff-size 18)
\paper {
  paper-width = 21.0 \cm
  paper-height = 29.7 \cm
  top-margin = 1.0 \cm
  bottom-margin = 1.0 \cm
  left-margin = 1.0 \cm
  right-margin = 1.0 \cm
  indent = 1.6 \cm
  short-indent = 0.2 \cm
  system-system-spacing.padding = 0.8 \cm
  ragged-last = ##t
}
(See the LilyPond docs on Creating titles headers and footers and Page layout.)
Tempo Text
Next let’s modify the “Andantino” tempo text to align it a bit more to the left.
Move the cursor over it and click on it to go to the beginning
of the section of the file where the notes of the right hand staff are
specified. (Alternatively, you can search for the variable named
PartPOneVoiceOne with “Control” + “F”.)
PartPOneVoiceOne =  {
  \clef "treble" \key g \major \time 6/8 | % 1
  g'8 ( -1 [ ^\markup{ \bold {Andantino} } _\p b'8 -2 _\markup{
    \small\italic {dolce cantabile}
  } c''8 ] d''8 [ b'8 -1 e''8 -3 ]
Here, you have to remove the text ^\markup{ \bold {Andantino} }, and then add
a line after the one that
starts with \clef, with the text \tempo "Andantino". (See the LilyPond docs
on
\tempo.)
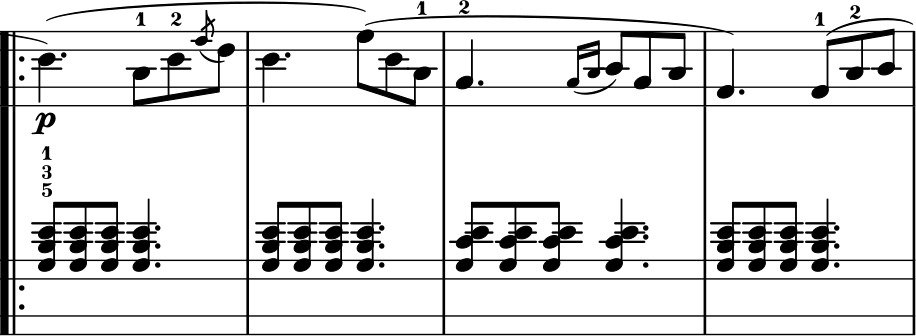
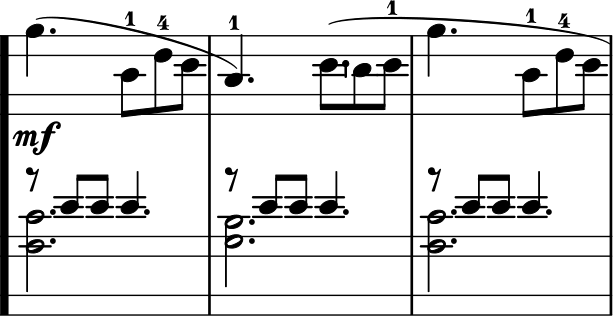
Stem Directions
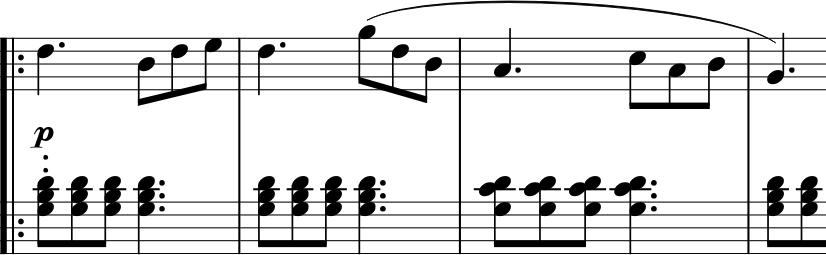
Probably you have noticed something weird in the left-hand staff of the score: the direction of the note stems is upwards where it should be downwards. This happens because there are bars with two voices for the left hand. In this case, the notes of voice 1 have upward stems, and the notes of voice 2 have downward stems (exactly, odd voices have upward stems and even voices have downward stems). For example, below you can see this in measures 3-6.
To change this behaviour, we can use these commands:
\stemUpto specify stems pointing up.\stemDownto specify stems pointing down.\stemNeutralto specify that the stem direction should be based on the note’s position on the staff.
These commands affect the stems of all of the following notes. For example, click on one of the first notes of the left-hand staff of the third measure, to go to the corresponding LilyPond text.
PartPOneVoiceFive =  {
  \clef "bass" \key g \major \time 6/8 R2.*2 \repeat volta 2 {
    <g b d'>8 -5 [ -3 -1 <g b d'>8 <g b d'>8 ] <g b d'>4. <g b d'>8
    [ <g b d'>8 <g b d'>8 ] <g b d'>4. <g c' d'>8 [ <g c' d'>8 <g c'
Now write, just before the first notes, \stemNeutral, and render the score.
PartPOneVoiceFive =  {
  \clef "bass" \key g \major \time 6/8 R2.*2 \repeat volta 2 {
    \stemNeutral <g b d'>8 -5 [ -3 -1 <g b d'>8 <g b d'>8 ] <g b d'>4. <g b d'>8
    [ <g b d'>8 <g b d'>8 ] <g b d'>4. <g c' d'>8 [ <g c' d'>8 <g c'
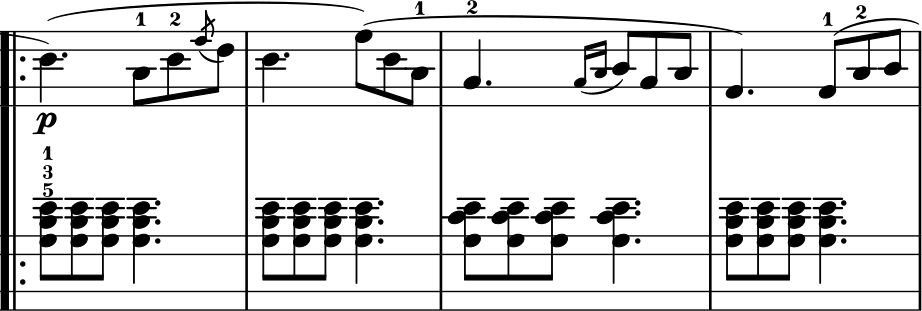
You will see that now almost all of the note stems of the left-hand staff are
correct, specifically the notes of voice 1. Now let’s do the same with voice 2.
Go to measure 11, click on the eighth rest or one of the D notes, and write
\stemNeutral just after \clef "bass".
This time you may not see many changes, and the notes from measure 11 and the
followings have not changed. This is because \stemNeutral does not take into
account the existance of multiple voices. Therefore, in measures with multiple
voices, we have to manually specify the stem direction.
Go back to measure 11 and replace \stemNeutral with \stemUp.
PartPOneVoiceSix =  {
  \clef "bass" \key g \major \time 6/8 s1. \repeat volta 2 {
    s4*15 s2. | % 9
    \clef "treble" s1.
  }
  | % 11
  \clef "bass" \stemUp d''8 \rest d'8 [ d'8 ] d'4. d''8 \rest d'8 [ d'8 ] d'4.
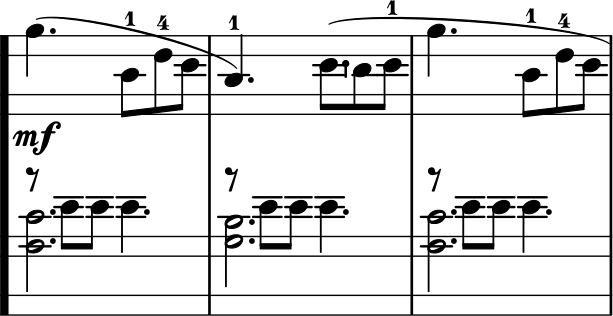
Great. Now, go to measure 18 and click on the first D note on the left-hand staff.
Write \stemDown before it, and \stemNeutral after the end of the bar.
Also, to change the slur direction, click on the slur (~) and write an
underscore before it.
  ] _\! fis'2. ) g'4. <c' e'>4. \stemDown d'4. _~ d'4 r8 | % 19
  \stemNeutral \clef "bass" <g b d'>8 [ <g b d'>8 <g b d'>8 ] <g b d'>4. <g b d'>8
(See the LilyPond docs on direction and placement and multiple voices.)
Rest Positions
Note that in this last measure (number 18), we have three rests.
Click on the first one to go to
the corresponding LilyPond text for voice 2 (variable PartPOneVoiceSix).
f''8 \rest g'8 [ g'8 ] fis'4 r8
At the end, we have r8, which is an eighth rest. But
at the beginning we have the text f''8 \rest. This is actually another eighth
rest, but in a different notation which allows us to specify the position of
the rest. Therefore, if you ever want to change the position of a rest in any
part of the score, you just have to switch from the notation that uses r to
the one that uses \rest.
In general, rests are imported as plain rests (without position information). However, if we manually changed the height of a rest in MuseScore, then it will also be specified when importing the score to Frescobaldi. (See the LilyPond docs on rests.)
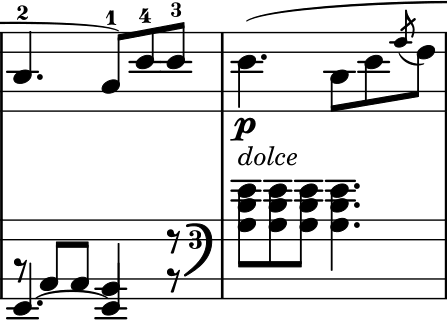
Fingering Digit Positions
Now, look at the third measure, bottom staff.
We will change the location of the three fingering digits to reduce the distance between both staffs. Click on any of the numbers to go to the corresponding LilyPond text.
PartPOneVoiceFive =  {
  \clef "bass" \key g \major \time 6/8 R2.*2 \repeat volta 2 {
    \stemNeutral <g b d'>8 -5 [ -3 -1 <g b d'>8 <g b d'>8 ] <g b d'>4. <g b d'>8
Look at the line that starts with \stemNeutral, in particular the part
<g b d'>8 -5 [ -3 -1. This is the chord we are interested in. The numbers
preceded by a hyphen (’-’) are the fingering digits. Now, remove them and
rewrite each of them but just next to the corresponding note, like this:
PartPOneVoiceFive =  {
  \clef "bass" \key g \major \time 6/8 R2.*2 \repeat volta 2 {
    \stemNeutral <g-5 b-3 d'-1>8 [ <g b d'>8 <g b d'>8 ] <g b d'>4. <g b d'>8
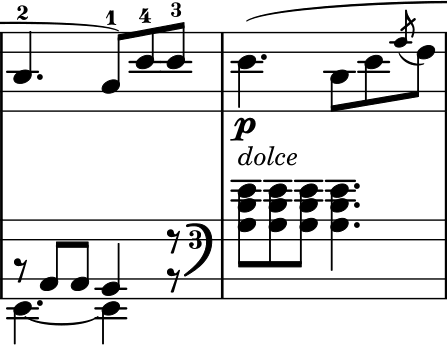
That’s it. Now the “5” is displayed below the bottom staff as shown below.
If you wanted to specify that a certain fingering number should be displayed
above or below the notes, you can use a hat symbol (^) or an underscore (_)
instead of a hyphen (-), respectively.
(See the LilyPond docs on
fingering.)
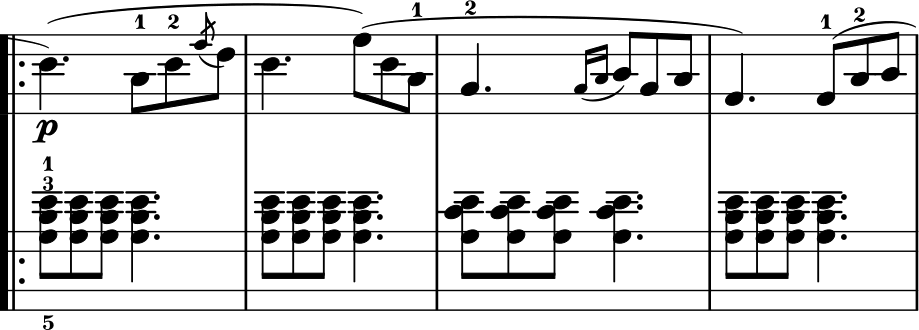
And that would be all. The final score should look similar to the one below.
In this post we covered two ways to convert sheet music in PDF format to Clairnote music notation. The first is by using MuseScore and the MuseScore website to create a MuseScore file from the PDF. The second is by using Audiveris to scan the PDF file and export it as a MusicXML file. In either case the resulting MuseScore or MusicXML file can be edited in MuseScore and then in Frescobaldi. We also explained in detail how to correct some of the possible errors you may encounter in the conversion process, both in MuseScore and Frescobaldi. Over time, as these tools improve, there should be fewer things to correct.
Here are links to the final files for Burgmüller’s La Pastorale.
And the files as they were before we made any changes:
- La Pastorale - MusicXML file exported from Audiveris
- La Pastorale - MusicXML file exported from MuseScore
- La Pastorale - LilyPond file after conversion from the MusicXML file
And here are some links to the software we used: