Creating Clairnote Sheet Music: Burgmüller's Tarantella
In the previous two posts, we learned how to write sheet music in Clairnote notation using different software: LilyPond, Frescobaldi, MuseScore, and Audiveris. In all the examples we saw, after editing the piece in MuseScore, there were still some minor changes to be done with LilyPond (through Frescobaldi).
In this post we will cover some more cases in which one has to finish the editing of the score in Frescobaldi, but some of these are actually important changes instead of minor ones. We will use as an example the piano piece Tarantella, written by Friedrich Burgmüller.
Importing into Frescobaldi
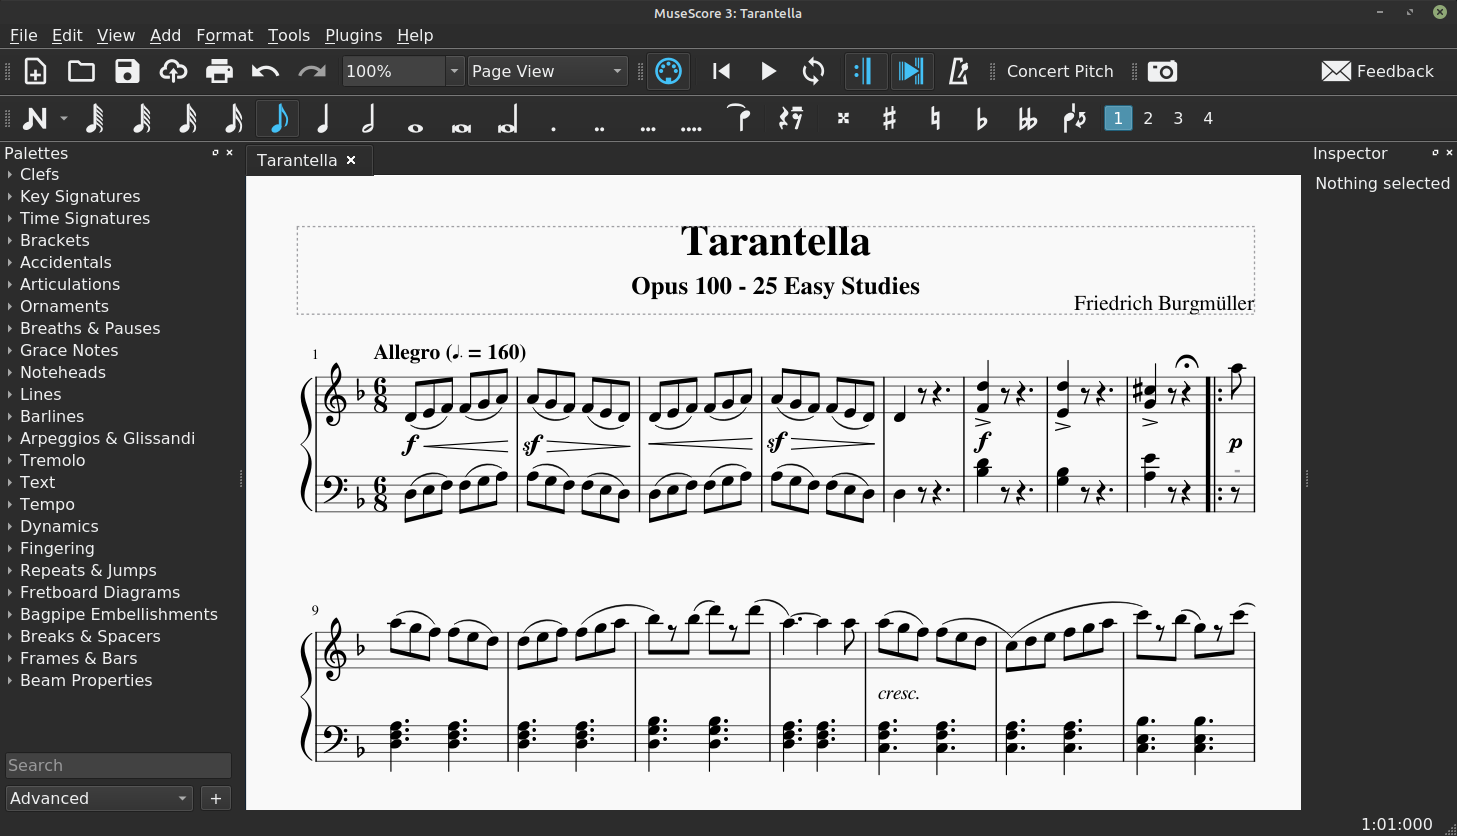
Let’s suppose we have already transcribed this piece directly in MuseScore, or that we used Audiveris to automatically transcribe it from some existing sheet music. In any case, we start from the finished version of the score in traditional notation in MuseScore.
Now we export it to MusicXML format and import it into Frescobaldi as described in the first blog post in this series. Then, to convert it to Clairnote music notation, add the line \include "clairnote.ly" to the beginning of the file, save it and render it.
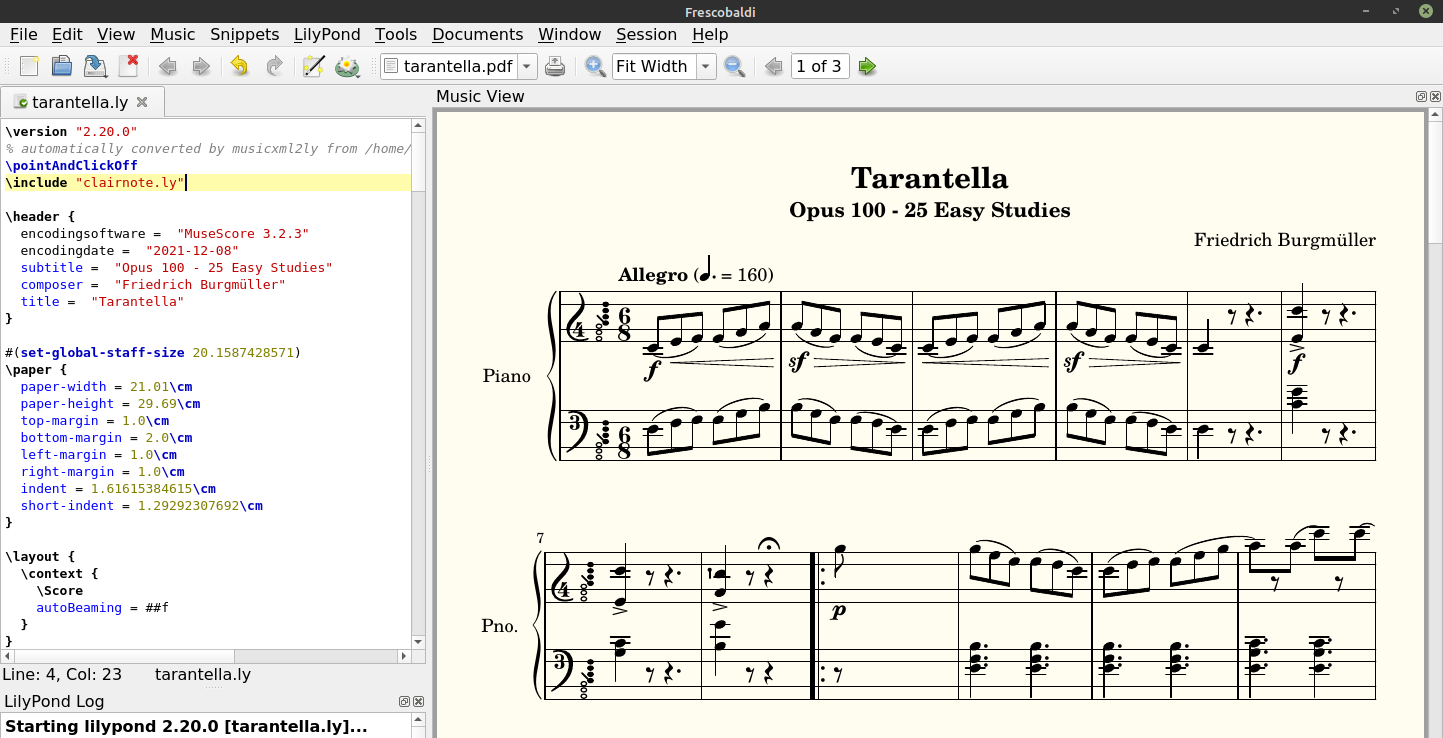
There are many things that we can change in the LilyPond file to make the score look better. Before starting with the edits, make sure to comment out the line \pointAndClickOff, at the beginning of the text file, writing a % before it. This way, we can place the cursor over a certain element of the score and click on it in order to go to the corresponding part of the LilyPond text.
Page Layout
First of all, we can remove the “Pno.” text at the beginning of the rows of staves. Go to the end of the text file, to the part below the comment % The score definition, and look for the following lines:
  \set PianoStaff.instrumentName = "Piano"
  \set PianoStaff.shortInstrumentName = "Pno"
Change the text between double quotation marks, leaving the last one empty (""). Now, to change the left margin of the page, go to the beginning of the text file, to the section starting with \paper, and reduce the value of the variable named short-indent to, for example, 0.2 centimeters (short-indent = 0.2 \cm).
Then, if you want to increase the space between systems (the pair of piano staves), add a variable named system-system-spacing.padding, and try setting it to different values; for example, 0.2 centimeters.
To get the last measure of the piece to not be displayed at the right of the page, add a variable called ragged-last and assign its value to ##t (meaning true): ragged-last = ##t.
To modify the text at the bottom of the page, you can also add the variable tagline in the \header section (just above the \paper section). To remove it entirely write tagline = "".
Tempo Indication
With respect to the tempo indication, unlike in the previous blog posts, this time it is already correct. This is because in MuseScore we specified the value of the beats per minute (BPM) in the tempo text itself.
Key Signatures
Now, look at the first measure. Do you see anything wrong?
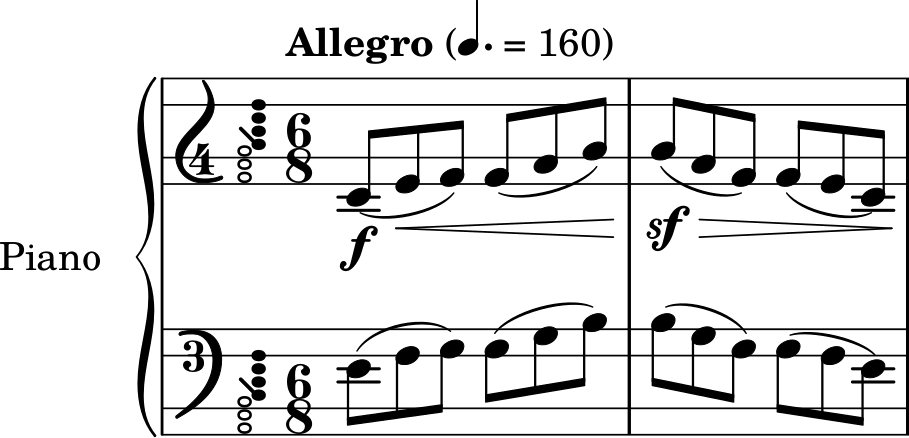
Probably not, but there is one thing wrong: the key of the piece. It shows the piece is in F major, but it is actually in D minor. In traditional notation, these two keys are displayed exactly the same, with only one sharp (in general, all relative scales are shown with the same number of flats or sharps). However, in Clairnote these two keys are displayed differently, because the circle that indicates the tonic has to be the lowest one.
To change this, place the cursor over the key signature of the right hand staff and click on it, to jump to the corresponding LilyPond text.
PartPOneVoiceOne = {
  \repeat volta 2 {
    \clef "treble" \key f \major \time 6/8 | % 1
    \tempo "Allegro" 4.=160 | % 1
    d'8 ( [ _\f e'8 _\< f'8 ) ] f'8 ( [ g'8 a'8 ) ] | % 2
As you can see, in the third line there is a \key f \major. Just replace it with \key d \minor. Then, do the same with the left hand staff.
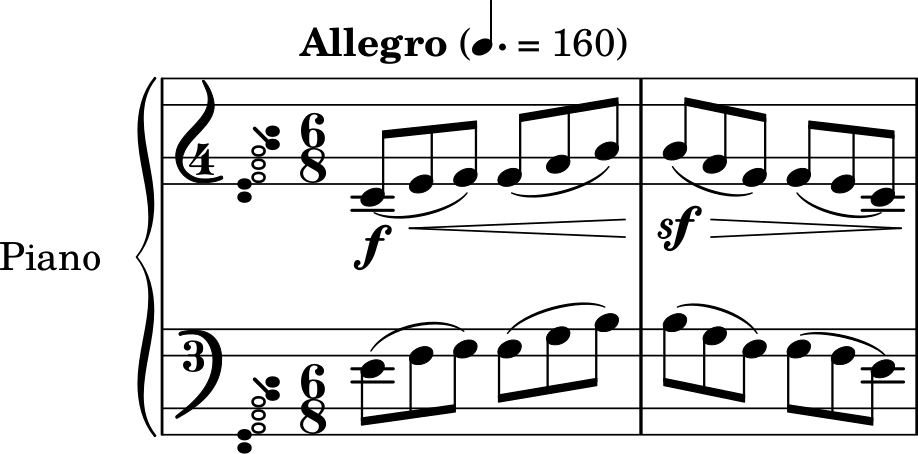
That’s it. This piece starts in D minor, then changes to D major, and finally goes back to D minor. So you should also change the key of the LilyPond text in this last key change, near the end of the piece, where the main theme plays again.
Skip Signs
Okay, these are minor changes, but let’s move on to more important ones. Look at measure 9, which has a repeat sign that divides it into two parts. The first one seems fine, but the second one has a lot of space, right?

Moreover, if you look at the first measure of the next row (not shown in the image), it shows 13 instead of 12. This is because the original repeat sign was not read properly and was instead interpreted as a measure separator, so now there are two measures where there was only one before. Let’s look at the LilyPond text to see what’s happening.
The variables which define the notes of each staff are: PartPOneVoiceOne for the top staff (right hand) and PartPOneVoiceFive for the bottom staff (left hand). Let’s see the corresponding LilyPond text for the notes of the right hand staff in measure 9 (you can place the cursor over any of the notes and click on it to go to the corresponding LilyPond text).
  <g' cis''>4 -> r8 r4 ^\fermata s8 \repeat volta 2 {
    | % 9
    a''8 _\p s8*5 | \barNumberCheck #10
The \repeat volta 2 is the repeat sign. Before it and after the rest with a fermata (r4 ^\fermata) we can see an s8. What is this? This is a skip sign; it will fill the measure with the indicated duration (in this case 8, that is, a quaver) but no symbol will be displayed. The same happens after the repeat sign and after the A quaver: s8*5 means an s8 skip but five times. These skips are what is causing the wide space after the A note (and also a tiny space just before the repeat sign).
To solve this, just delete all the skips in these two lines. You can also delete the | % 9 and the \barNumberCheck #10, as it does not correspond to the actual bar number, or else update it to the correct bar number.
  <g' cis''>4 -> r8 r4 ^\fermata \repeat volta 2 {
    a''8 _\p | \barNumberCheck #9
Then do the same for the left hand staff. Below is the original text, which is a bit harder to read because a new line does not always correspond to a new measure.
  r8 r4. <g bes>4 r8 r4. <a e'>4 r8 r4 s8 \repeat volta 2 {
    r8 s8*5 <d f a>4. <d f a>4. <d f a>4. <d f a>4. <d g bes>4.
And here is the corrected text:
  r8 r4. <g bes>4 r8 r4. <a e'>4 r8 r4 \repeat volta 2 {
    r8 <d f a>4. <d f a>4. <d f a>4. <d f a>4. <d g bes>4.

Fine. Now, similarly, you can repeat the same procedure to correct all of the other measures with repeat signs in the score (measures 16, 32, 49, and 57). The last one, however, is a bit different.
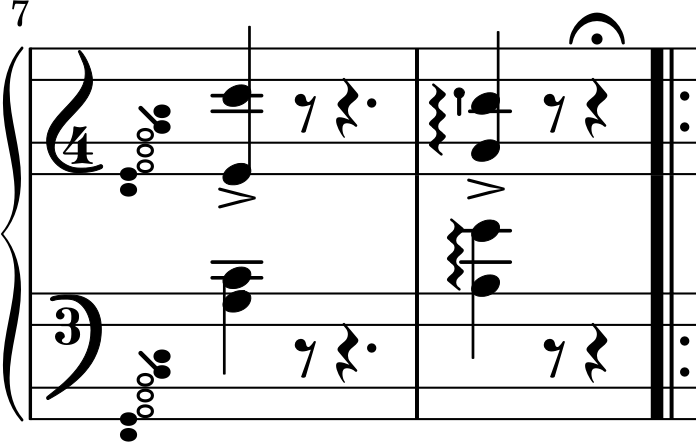
Missing Repeat Sign
Let’s look at the last of the repeat signs. Below you can see the corresponding measures, but the repeat sign is actually missing!
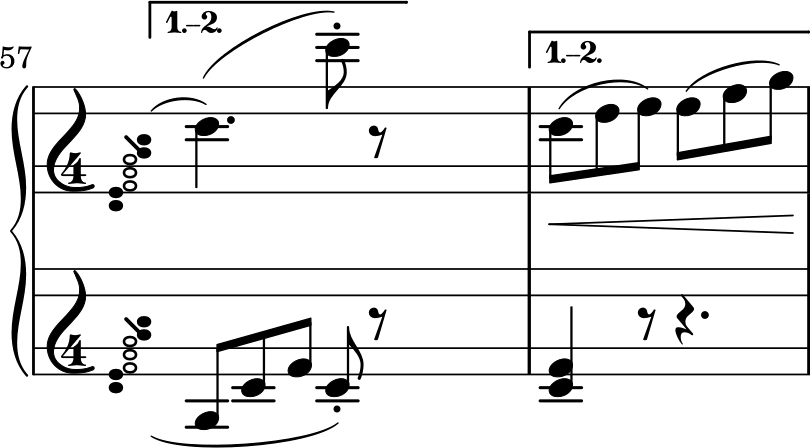
Let’s check the corresponding LilyPond text, for the right hand staff.
  \alternative {
    {
      | % 61
      d''4. ) ( d'''8 ) -. r8
    }
  } s8
}
\alternative {
  {
    | % 62
    d''8 ( [ _\< e''8 f''8 ) ] f''8 ( [ g''8 a''8 ) ]
  }
} | % 63
Well, this is a tricky part, because it is not easy to find the mistakes.
First of all, the second \alternative is not necessary at all. Therefore, we are going to delete the line \alternative {, and also the two previous closing brackets, that is, the one just before it and the one that precedes the s8 skip. Then, there is also a problem with that skip, because it should be with the rest of the notes, that is, just after the r8 rest and before the next closing bracket. These changes will give us the following text:
 \alternative {
    {
      | % 61
      d''4. ) ( d'''8 ) -. r8
      s8
    }
    {
      | % 62
      d''8 ( [ _\< e''8 f''8 ) ] f''8 ( [ g''8 a''8 ) ]
    }
  } | % 63
Good, we are almost done. Let’s see the remaining text until the end of the current voice.
 \alternative {
    {
      | % 61
      d''4. ) ( d'''8 ) -. r8
      s8
    }
    {
      | % 62
      d''8 ( [ _\< e''8 f''8 ) ] f''8 ( [ g''8 a''8 ) ]
    }
  } | % 63
  a''8 ( [ _\! _\sf g''8 _\> f''8 ] e''8 [ f''8 e''8 ] | % 64
  d''8 ) ( [ _\! _\< e''8 f''8 ) ] f''8 ( [ g''8 a''8 ) ] | % 65
  a''8 ( [ _\! _\sf g''8 _\> f''8 ] e''8 [ f''8 e''8 ] | % 66
  d''8 ) ( [ _\! e''8 f''8 ) ] f''8 ( [ gis''8 a''8 ) ] | % 67
  a''8 ( [ cis'''8 d'''8 ) ] d'''8 ( [ f'''8 e'''8 ] | % 68
  \ottava #1 _\markup{ \small\italic {dimin. e poco riten.} } | % 68
  d'''8 ) ( [ e'''8 f'''8 ) ] f'''8 ( [ gis'''8 a'''8 ) ] | % 69
  a'''8 ( [ cis''''8 d''''8 ) ] d''''8 ( [ f''''8 e''''8 ] |
  \barNumberCheck #70
  d''''4 ) \ottava #0 r8 r4. | % 71
  <f' d''>4 ^\markup{ \italic {a tempo} } _\f r8 <f' d''>4 r8 | % 72
  <f' d''>2. \bar "|."
}
Notice that last closing bracket. Where does it come from? Where is the corresponding opening bracket? To answer this, let’s go to the beginning of the voice.
PartPOneVoiceOne =  {
  \repeat volta 2 {
	\clef "treble" \key d \minor \time 6/8 | % 1
	\tempo "Allegro" 4.=160 | % 1
	d'8 ( [ _\f e'8 _\< f'8 ) ] f'8 ( [ g'8 a'8 ) ] | % 2
	a'8 ( [ _\! _\sf _\> g'8 f'8 ) ] f'8 ( [ e'8 d'8 ) ] | % 3
We can see one opening bracket just after the definition of the voice variable. This is needed to enclose all the notes corresponding to this variable. But then, there is a \repeat volta 2 {, with another opening bracket which encloses all the notes as well. But if we go to the end of this voice, we only see one closing bracket. We have two options to solve this. We can either add a closing bracket just at the end of the voice, or just delete the line \repeat volta 2 { at the very beginning. We recommend this latter option, as the wrapping of each voice inside a \repeat volta 2 is totally unnecessary (it was caused by a mistake in the importing procedure from the MusicXML file). Therefore, we should get the following text:
PartPOneVoiceOne =  {
	\clef "treble" \key d \minor \time 6/8 | % 1
	\tempo "Allegro" 4.=160 | % 1
	d'8 ( [ _\f e'8 _\< f'8 ) ] f'8 ( [ g'8 a'8 ) ] | % 2
	a'8 ( [ _\! _\sf _\> g'8 f'8 ) ] f'8 ( [ e'8 d'8 ) ] | % 3
Now, the opening bracket is paired with the closing bracket at the end of the voice. Then, we should repeat the same steps for the left-hand staff. Originally, we have the following text:
  \alternative {
      {
        a8 [ d'8 f'8 ] d'8 ) -. r8
      }
    } s8
  }
  \alternative {
    {
      | % 62
      \clef "treble" <d' f'>4 r8 r4.
    }
} <a cis' g'>4. <a cis' g'>4. <d' f'>4 r8 r4. <a cis' g'>4. <a
  cis' g'>4. <d' f'>4 r8 r4. | % 67
  \clef "bass" <d f a>4. <d f a>4. <d f a>2. <d f a>4. <d f a>4. <d f
  a>4 r8 r4. <d a>4 r8 <d a>4 r8 <d a>2. \bar "|."
}
And in the end it should be like the following:
  \alternative {
    {
      a8 [ d'8 f'8 ] d'8 ) -. r8
      s8
    }
    {
      | % 62
    	\clef "treble" <d' f'>4 r8 r4.
    }
  } <a cis' g'>4. <a cis' g'>4. <d' f'>4 r8 r4. <a cis' g'>4. <a
  cis' g'>4. <d' f'>4 r8 r4. | % 67
  \clef "bass" <d f a>4. <d f a>4. <d f a>2. <d f a>4. <d f a>4. <d f
  a>4 r8 r4. <d a>4 r8 <d a>4 r8 <d a>2. \bar "|."
}
On the other hand, for the beginning of the voice we had:
PartPOneVoiceFive =  {
  \repeat volta 2 {
	\clef "bass" \key d \minor \time 6/8 d8 ( [ e8 f8 ) ] f8 ( [ g8
	a8 ) ] a8 ( [ g8 f8 ) ] f8 ( [ e8 d8 ) ] d8 ( [ e8 f8 ) ] f8 ( [
	g8 a8 ) ] a8 ( [ g8 f8 ) ] f8 ( [ e8 d8 ) ] d4 r8 r4. <bes d'>4
And in the end we should have the following:
PartPOneVoiceFive =  {
	\clef "bass" \key d \minor \time 6/8 d8 ( [ e8 f8 ) ] f8 ( [ g8
	a8 ) ] a8 ( [ g8 f8 ) ] f8 ( [ e8 d8 ) ] d8 ( [ e8 f8 ) ] f8 ( [
	g8 a8 ) ] a8 ( [ g8 f8 ) ] f8 ( [ e8 d8 ) ] d4 r8 r4. <bes d'>4
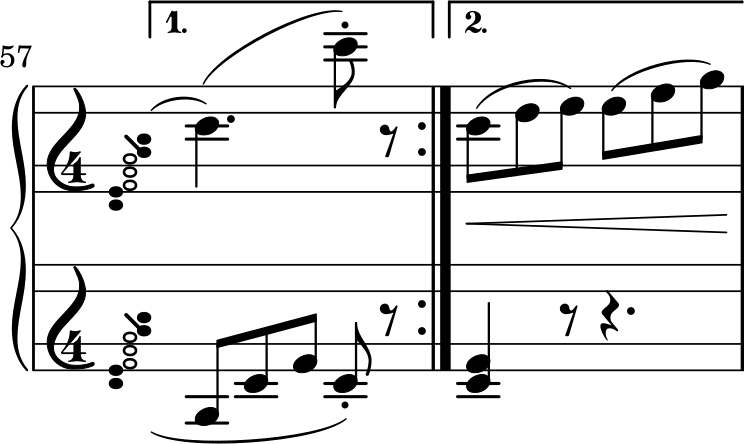
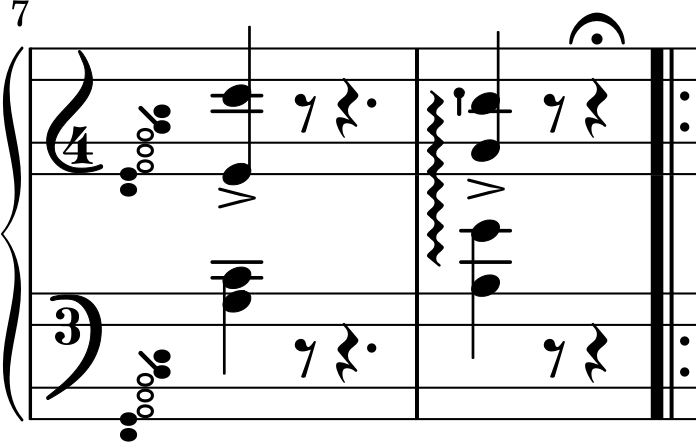
As you can see, the repeat sign is now displayed correctly. (See the LilyPond docs on Long Repeats)
Rest Positions
Once we have finished this, we are almost done. As we learned in the previous blog post, we can change the position of the rest symbols to make them look better. So we could do this with some of them, especially the quaver rests that lie between two other quavers (that is, the ones in measures 11, 15, 17-22, 27, 30, 31, 45-47, 52, 55, and 56).
Let’s remember how this is done with measure 11. The corresponding text of the LilyPond file for the right hand staff (variable PartPOneVoiceOne) is:
  bes''8 ) [ f''8 \rest bes''8 ( ] d'''8 ) [ f''8 \rest d'''8
    ( ] | % 13
Both rests are indicated by f''8 \rest. Just replace them by r8 or, alternatively, play with changing their heights until they are good enough.
  bes''8 ) [ r8 bes''8 ( ] d'''8 ) [ r8 d'''8
    ( ] | % 13
However, instead of doing this for every incorrectly positioned rest, we can correct all of them at once. Click on “Edit” > “Select All” (or type”Control” + “A”), and now click on “Tools” > “Rest” > “Replace positioned rests with plain rests”. This tool does just what it says. However, it doesn’t work that well, as it does not remove the simple quotation marks and commas that indicated the octave of the rest position. Therefore, click on “Edit” > “Replace” (or type “Control” + “H”), and replace the text r'' with r. For this piece, this is enough, but for other pieces you may need to do the same with r', r,, etc., until Frescobaldi/LilyPond renders the score correctly without any error message.
System Breaks and Page Breaks
Lastly, a minor detail. We have used the following parameters for the page layout.
#(set-global-staff-size 20)
\paper {
  paper-width = 21.01 \cm
  paper-height = 29.69 \cm
  top-margin = 1.0 \cm
  bottom-margin = 1.0 \cm
  left-margin = 1.0 \cm
  right-margin = 1.0 \cm
  indent = 1.6 \cm
  short-indent = 0.2 \cm
  system-system-spacing.padding = 0.2 \cm
  ragged-last = ##t
}
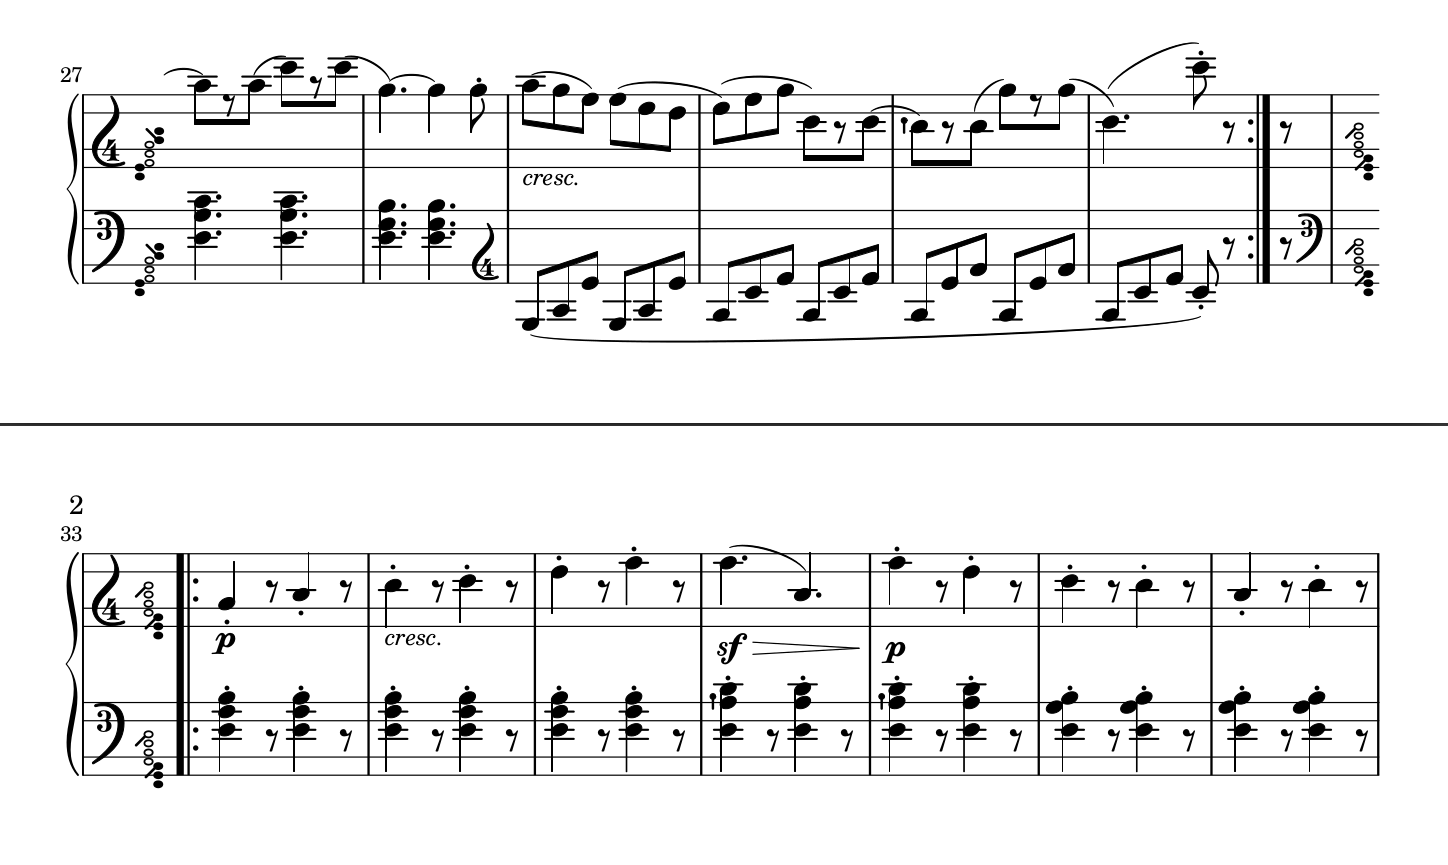
This way, we can fit the score in just two pages. However, at the beginning of page 2, we have the end of a musical part and the start of a new one, with a key change, as you can see below.
It would be better if the key change occured right at the very start, right? Well, we can force LilyPond to do it using the word \break. This will force a line break in the part of the score where it is located. Let’s see the corresponding LilyPond text for the right hand staff of measures 32 and 33.
  d''4. ) ( d'''8 ) -. r8
}
  | % 35
r8 \repeat volta 2 {
  | % 36
  \key d \major | % 36
  a'4 -. _\p r8 b'4 -. r8 | % 37
Now, we can put the line break just before the line with \repeat volta 2 {.
  d''4. ) ( d'''8 ) -. r8
}
  | % 35
r8
\break
\repeat volta 2 {
  | % 36
  \key d \major | % 36
  a'4 -. _\p r8 b'4 -. r8 | % 37
That’s it! By the way, in this case the result would have been the same if we had used a page break (\pageBreak).
Final Score
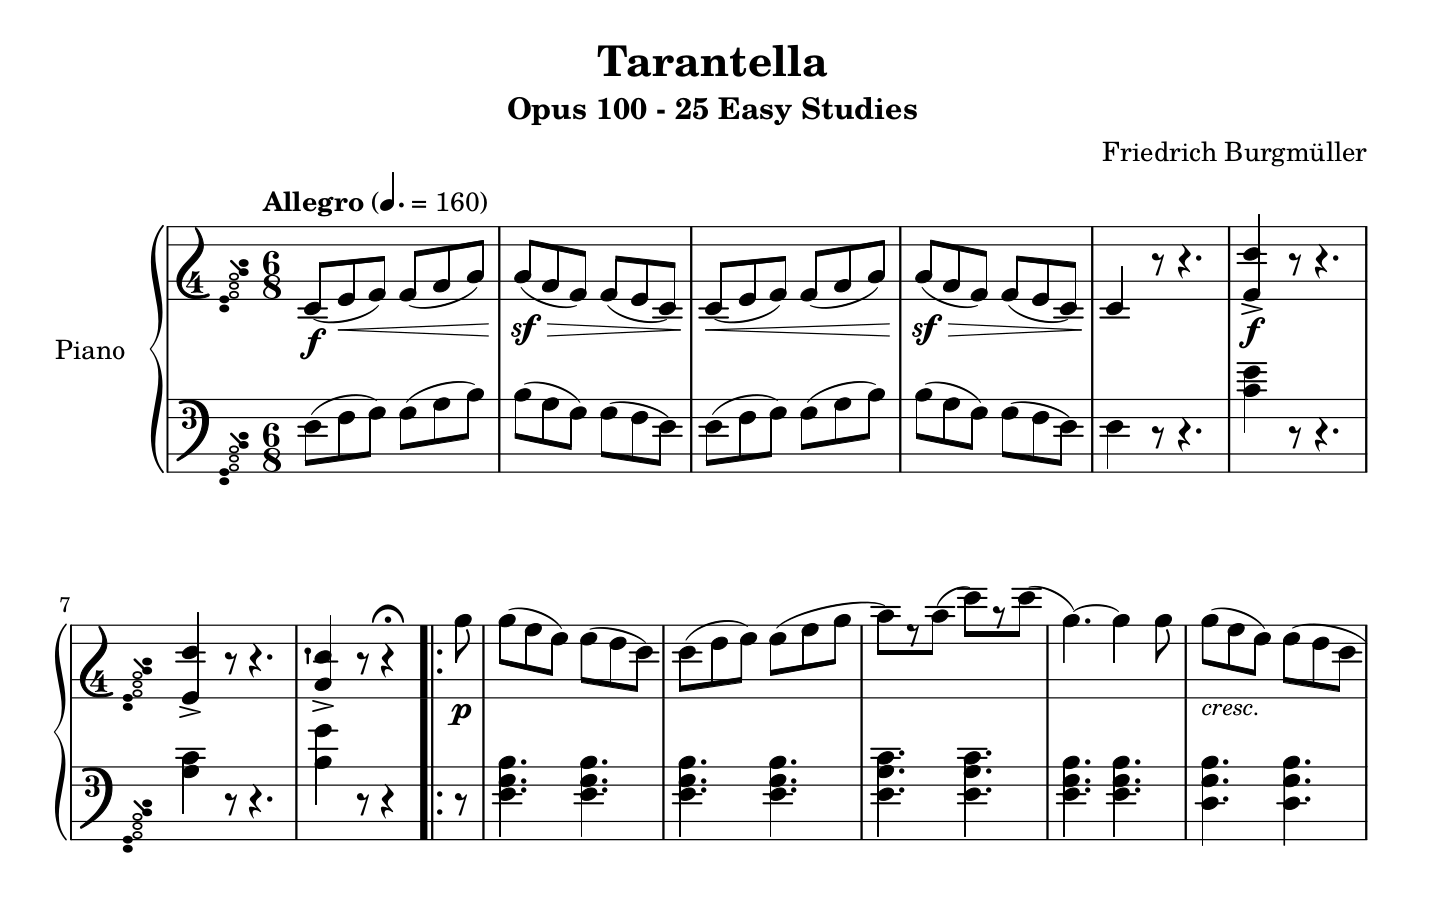
Well, that would be all! Now don’t forget to uncomment the line \pointAndClickOff (delete the % at the start of the line), save the score, and render it. In the end, you should get a score similar to the following one.
Extra Tip: Clef Changes
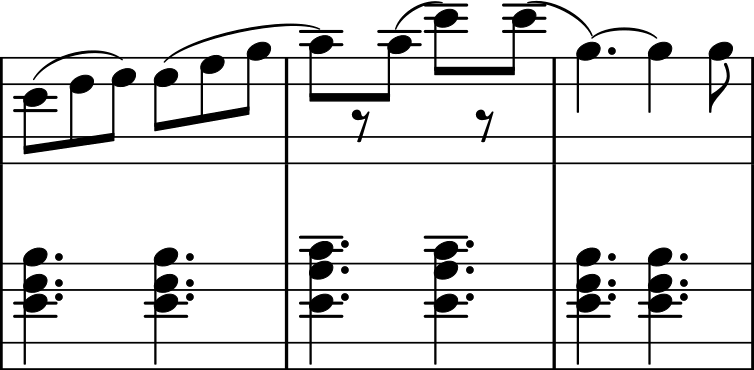
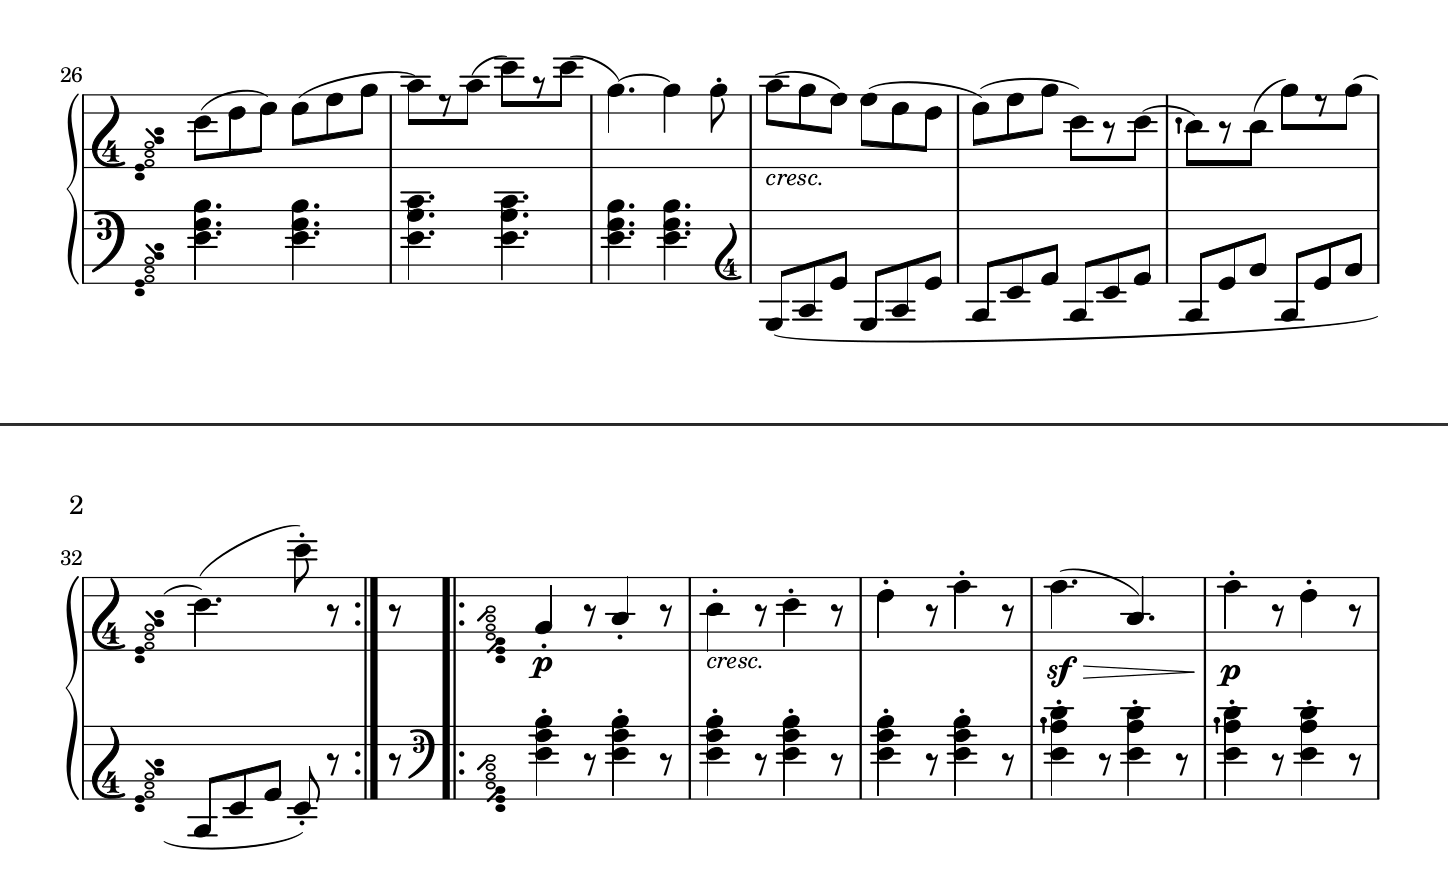
Throughout the piece, in the Clairnote version we have kept the clefs corresponding to the original ones, in order to make the score more similar to the original. However, in Clairnote we can make different (or more) clef changes than in traditional notation to reduce the number of additional lines. For example, consider the following passage (measures 27-32):
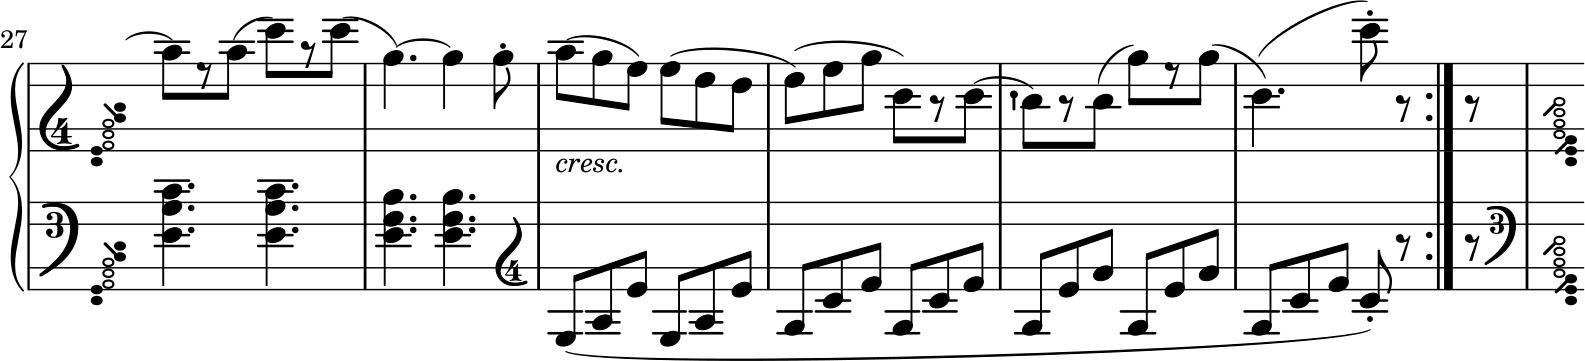
In the left-hand staff, we start with bass clef (the traditional F clef), and then we switch to treble clef (the traditional G clef). However, this makes several additional ledger lines appear below the staff. To avoid this, we can instead use the ‘alto’ clef (the traditional C clef). To do so, just click on any of the notes near the little treble clef on the left-hand staff at measure 29, to go to the corresponding LilyPond text, and replace the text \clef "treble" with \clef "alto". The result is the following:

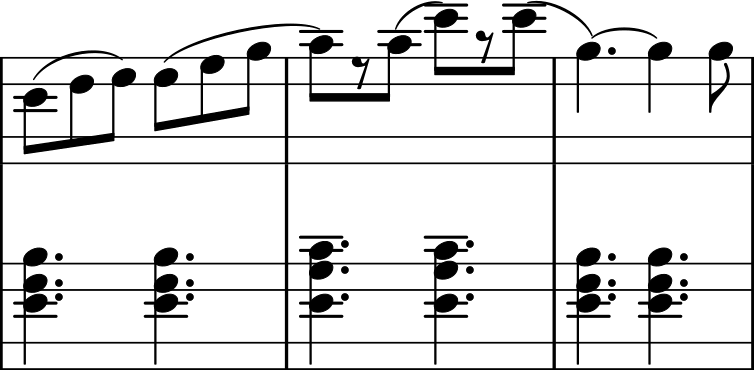
Now we have avoided all those additional lines below the left-hand staff. In general, in Clairnote it is more common to have situations like this, in which we can do a clef change to reduce the number of additional lines. In traditional notation it would not make sense to use an alto (C) clef like this, but it works fine in Clairnote because the clefs simply indicate the octave register of the staff and do not change the notes represented by the staff lines and spaces (see Clefs).
In LilyPond, in case you had several voices in a certain staff, you must change the clef in all of them to make the change visible (or delete the clef indications in all the voices except for one). As a reminder, here are the various clef names in LilyPond, from low to high: bass_16, bass_8, bass, alto, treble, treble^8, treble^16.
Alternatively, in some cases you may prefer to use an ottava alta or ottava bassa line. Those lines are transcribed correctly from MuseScore, but if you want to add them manually in LilyPond, you can use the text \ottava #1 or \ottava #-1, respectively, at the start of the octave change, and then use the text \ottava #0 at the end of the change.
Actually, in this piece the entire left-hand staff could be scored in alto clef instead of bass clef. Similarly, the left-hand staff of the pieces Innocence and Pastoral, from the two previous blog posts, could also be scored in alto clef for the whole piece (or almost the whole piece).
Extra Tip: Arpeggios
For the sake of completeness, let’s see how to write arpeggios. Imagine we wanted to play the notes in measure 8 as an arpeggio covering both staves. To specify it, first we have to write the command \arpeggio just after each of the desired notes. For example, measures 7 and 8 for the right-hand staff would be:
	<e' d''>4 -> r8 r4. | % 8
	<g' cis''>4 \arpeggio -> r8 r4 ^\fermata \repeat volta 2 {
And for the left-hand staff, they would be:
<g bes>4 r8 r4.
	<a e'>4 \arpeggio r8 r4 \repeat volta 2 {
If we render the score, we would get the following:
That is good, but we wanted the arpeggio to cover both staves. In order to have this behavior, we have to go to the end of the LilyPond file, to the \score section, and add \with {connectArpeggios = ##t} to the line \new PianoStaff. The resulting text would be:
\score {
  <<
    \new PianoStaff \with {connectArpeggios = ##t}
    <<
      \set PianoStaff.instrumentName = "Piano"
      \set PianoStaff.shortInstrumentName = ""
And now we get the desired result in the score.
(For more details see the LilyPond docs on Apreggios.)
That is all for this post. We have learned to polish our score in some complicated cases that need editing with LilyPond, for example: repeat signs placed inside a measure and rests inside beamed notes. We will continue showing some more cases like these in the next blog post. In the meantime, here are the final files for Burgmüller’s Tarantella.
And the files as they were before we made any changes:
- Tarantella - MusicXML file exported from MuseScore
- Tarantella - LilyPond file after conversion from the MusicXML file
And some links to the software we used: