Creating Clairnote Sheet Music for Guitar: Tárrega's Adelita
In this post we will learn how to write a piece for classical guitar in Clairnote using a three-octave staff with tablatures. We will use as an example the piece Adelita, written by Francisco Tárrega.
In the first two posts of this tutorial series, we learned how to write sheet music in Clairnote notation using different software: LilyPond, Frescobaldi, MuseScore, and Audiveris. In all the examples we saw, after editing the piece in MuseScore, there were still some minor changes to be done with LilyPond (using Frescobaldi). In the previous post we covered more complicated cases where one has to finish editing the score in Frescobaldi, using the piano piece Tarantella by Friedrich Burgmüller as an example.
In this post we will continue showing more complicated cases where we have to finish the score in Frescobaldi, and also learn how to write guitar scores with tablatures.
Importing into Frescobaldi
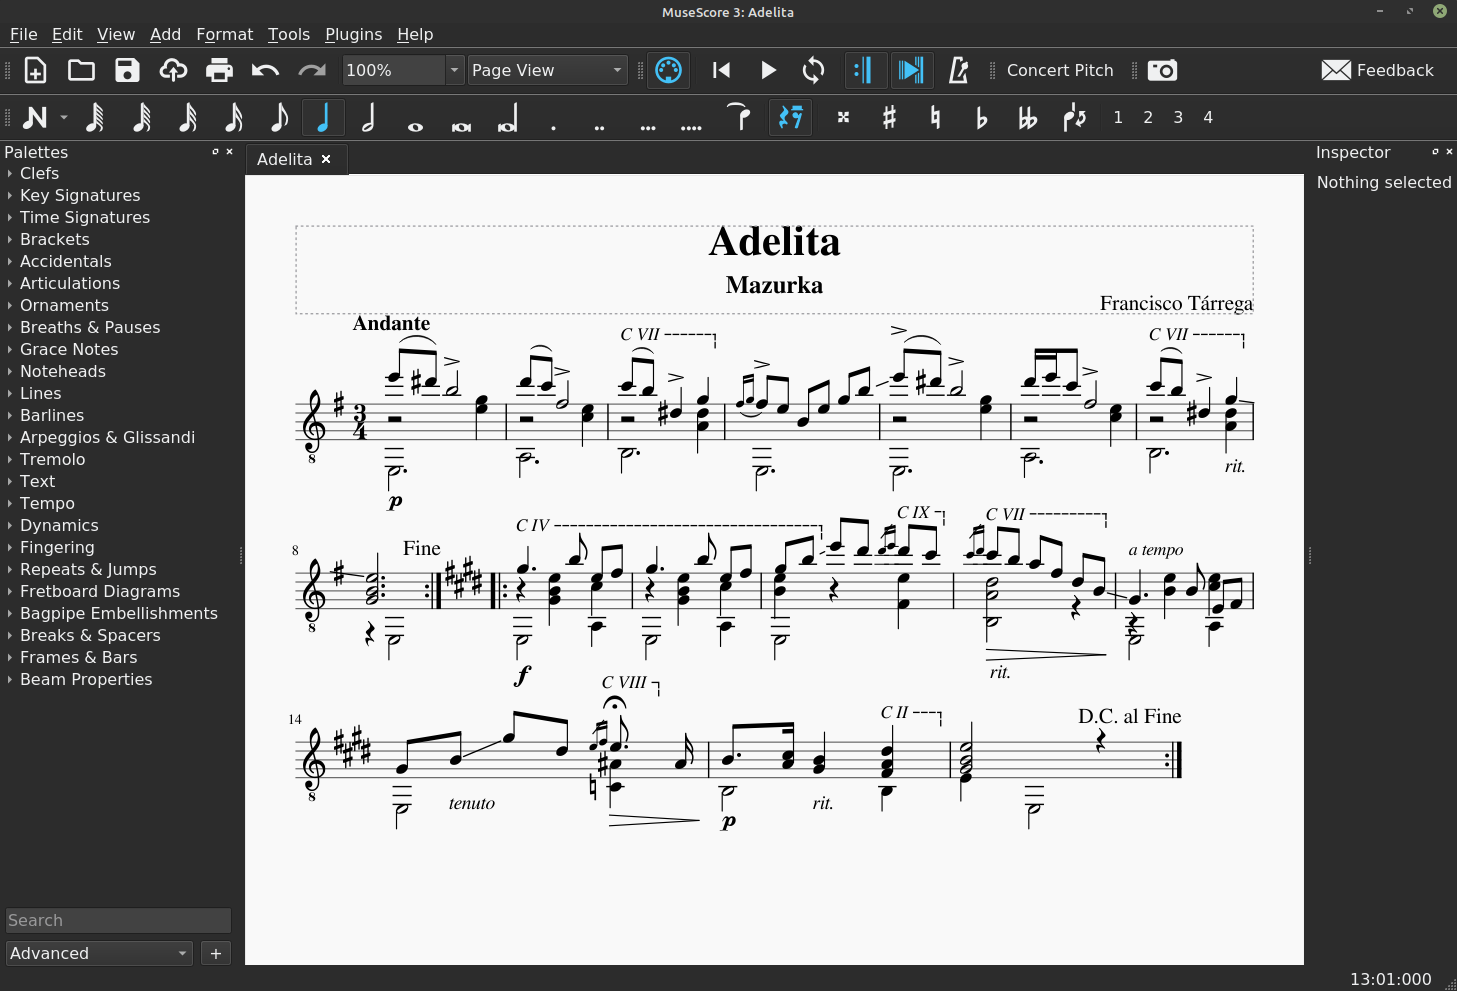
As with the piece from the previous post, we start from the point where we have the piece transcribed in MuseScore, but without tablatures. This is because, although one can create sheet music with tablatures in MuseScore, the conversion to LilyPond does not work for the tablature part.
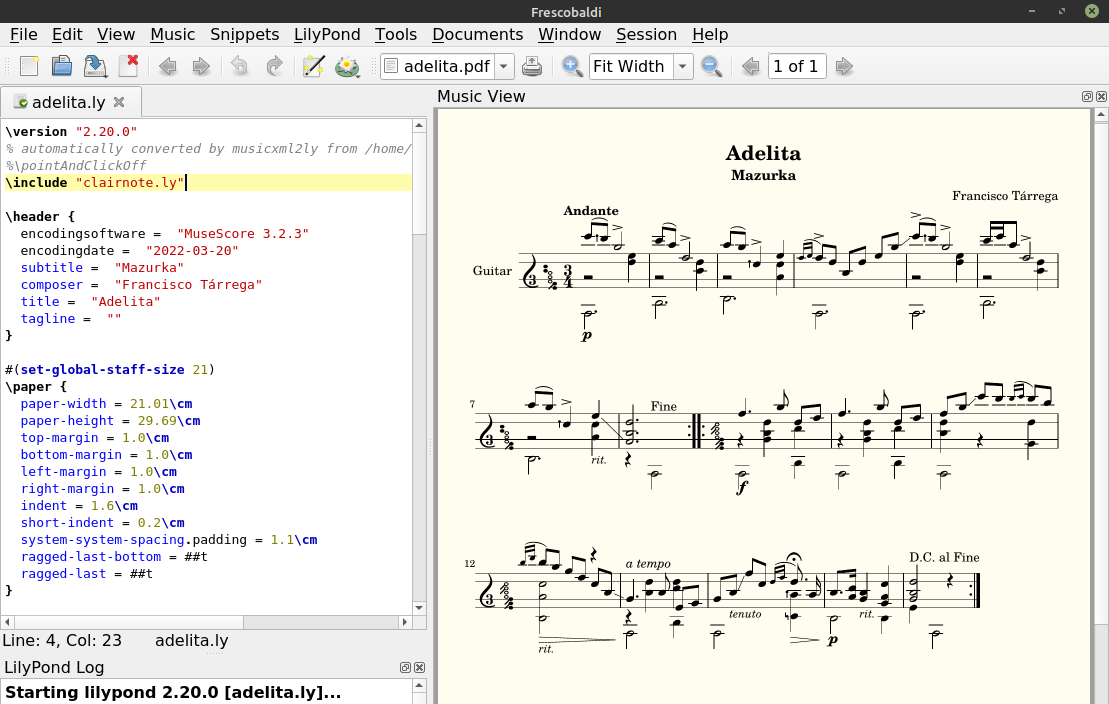
Export it to MusicXML format and import it into Frescobaldi as described in the first blog post in this series. Then to convert it to Clairnote music notation, add the line \include "clairnote.ly" at the beginning of the file, save the file, and render it.
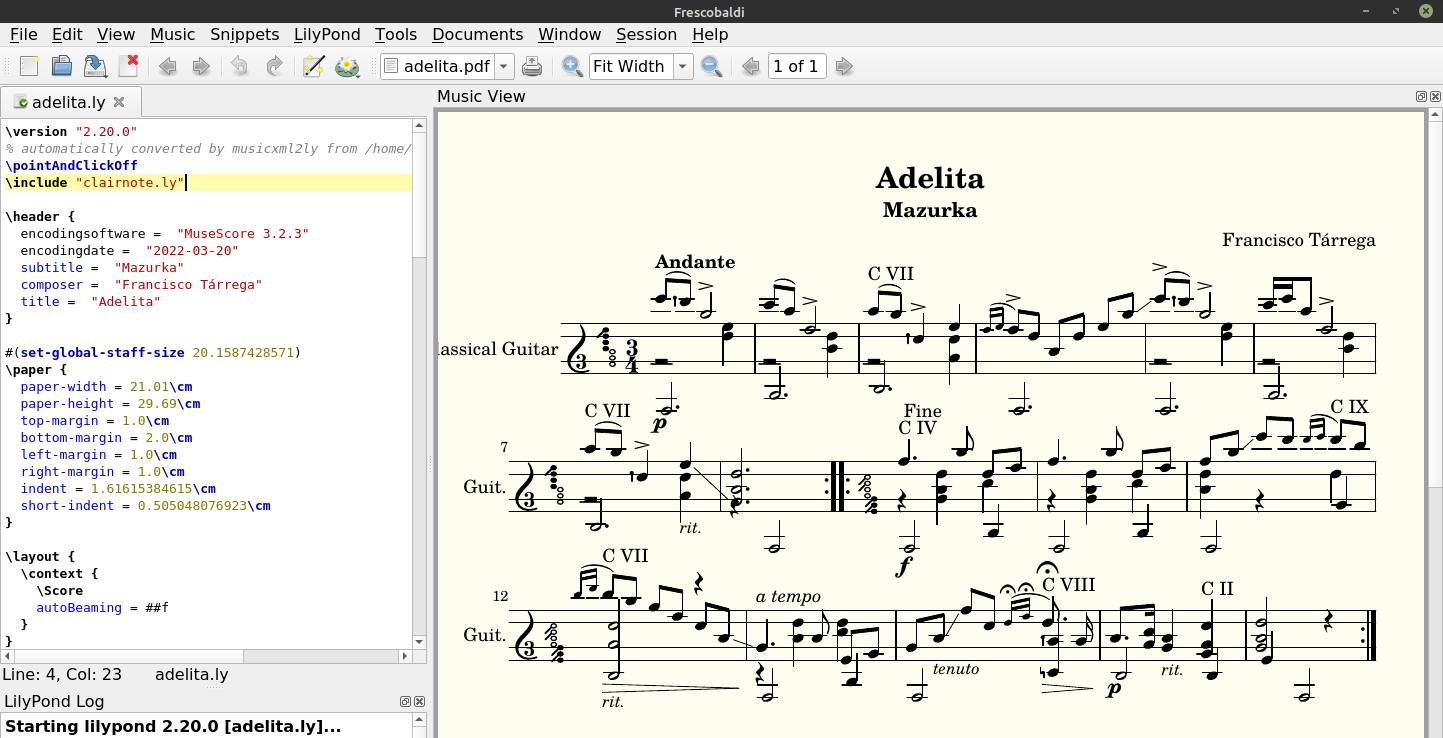
There are many things that we can change to make the score look better; for example, the lines next to the capo indications have disappeared. Before starting with the edits, make sure to comment out the line \pointAndClickOff, at the beginning of the text file, by writing a % before it. This way, we can now place the cursor over a certain element in the score and click on it to go to the corresponding part of the LilyPond text file.
Page Layout
Go to the end of the file, to the section that starts with \score, and find these lines:
      \set Staff.instrumentName = "Classical Guitar"
      \set Staff.shortInstrumentName = "Guit."
Then change the value of the first variable to just "Guitar" and the second one to "" (nothing). Now, add the variable tagline to the \header section to change the text at the bottom of the page, and add the following variables to the \paper section:
  system-system-spacing.padding = 0.8\cm
  ragged-last = ##t
You may also want to change some of the values of the other variables. For this score, we used the following values:
#(set-global-staff-size 21)
\paper {
  paper-width = 21.01\cm
  paper-height = 29.69\cm
  top-margin = 1.0\cm
  bottom-margin = 1.0\cm
  left-margin = 1.0\cm
  right-margin = 1.0\cm
  indent = 1.6\cm
  short-indent = 0.2\cm
  system-system-spacing.padding = 1.1\cm
  ragged-last = ##t
}
(For more details see the LilyPond docs on Fixed vertical spacing \paper variables and Flexible vertical spacing \paper variables.)
Key Signatures
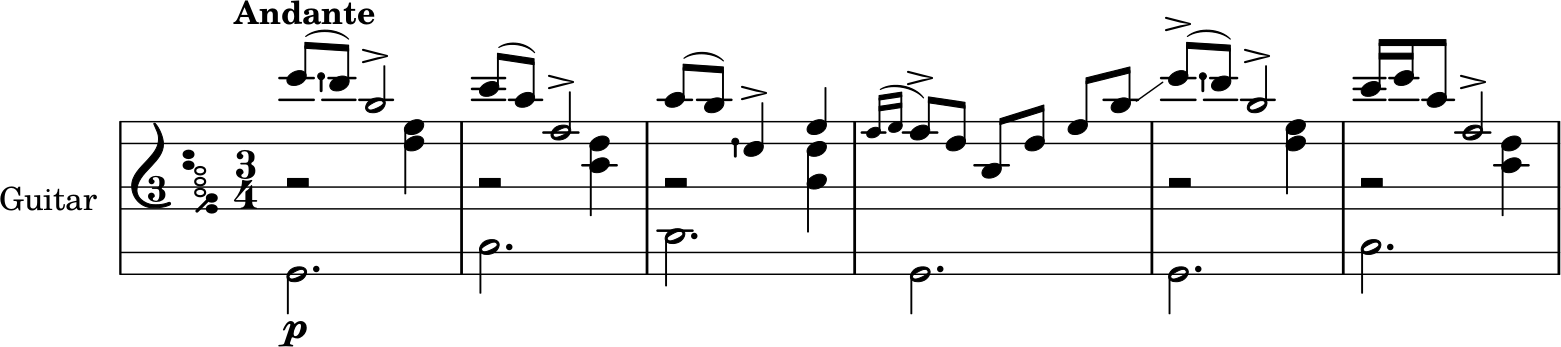
Look at the first measure.
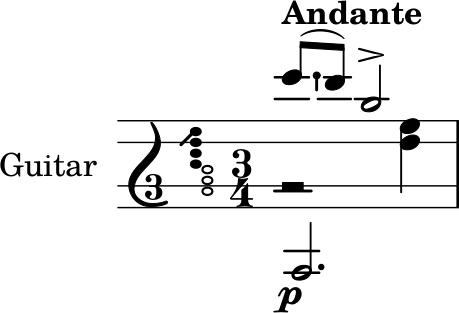
The key signature is G major, but this piece is actually in E minor until the repeat sign (where it changes to E major). To modify it, click on the key signature to go to the corresponding LilyPond text.
PartPOneVoiceTwo =  {
  \repeat volta 2 {
    \clef "treble_8" \key g \major \time 3/4 e,2. a,2. b,2. e,2. e,2.
    a,2. b,2. c4 \rest e,2
  }
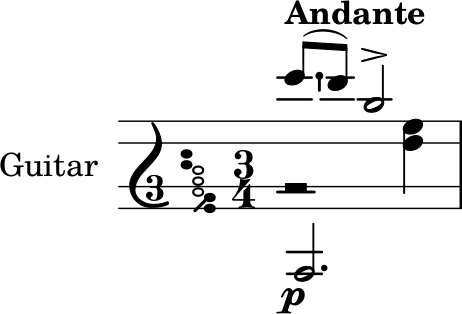
You will jump to the start of the variable PartPOneVoiceTwo. Replace the text \key g \major with \key e \minor.
PartPOneVoiceTwo =  {
  \repeat volta 2 {
    \clef "treble_8" \key e \minor \time 3/4 e,2. a,2. b,2. e,2. e,2.
    a,2. b,2. c4 \rest e,2
  }
Now, repeat the same but for the other two voices, that is, for the variables PartPOneVoiceOne and PartPOneVoiceThree (you can click on the first note of each corresponding measure, or just find the variable names with “Control” + “F”).
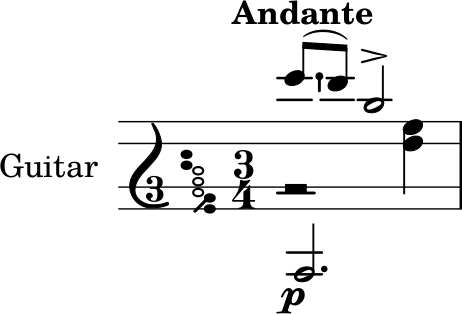
Tempo Indication
Let’s also correct the tempo indication, which should be aligned a little bit more to the left. Click on the tempo indication to go to the beginning of the variable PartPOneVoiceOne.
PartPOneVoiceOne =  {
  \repeat volta 2 {
    \clef "treble_8" \key e \minor \time 3/4 | % 1
    e''8 ( [ ^\markup{ \bold {Andante} } _\p dis''8 ) ] b'2 -> | % 2
Then remove the text ^\markup{ \bold {Andante} } and add the line \tempo "Andante" after the line that starts with \clef.
PartPOneVoiceOne =  {
  \repeat volta 2 {
    \clef "treble_8" \key e \minor \time 3/4 | % 1
    \tempo "Andante"
    e''8 ( [ _\p dis''8 ) ] b'2 -> | % 2
Capo and Repetition Texts
You can see in the previous screenshot that the lines next to the capo texts disappeared when we imported the score into Frescobaldi. For the moment, you can delete all the remaining capo texts, and we will add them properly later. So click on each of them, and remove the corresponding text. For example, for the first one, in measure 3, the corresponding line, from the variable PartPOneVoiceOne, is:
c''8 ( [ ^ "C VII" b'8 ) ] dis'4 -> g'4 | % 4
And you would have to delete the text ^ "C VII".
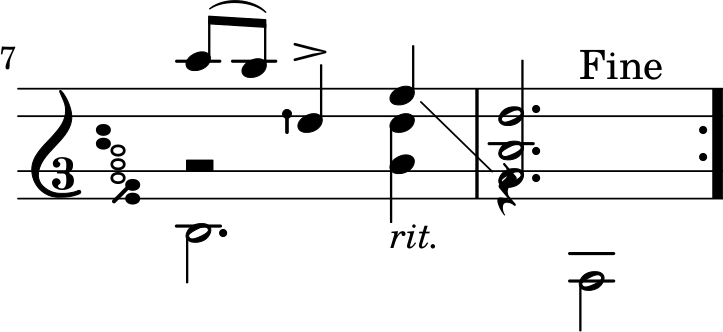
Let’s also consider the “Fine” and “D.C. al Fine” text from the original score in MuseScore. The “D.C. al Fine” is now missing, and the “Fine” is in measure 9, after the repeat sign, instead of measure 8, before the repeat sign. The LilyPond text for the voice that has the “Fine” is the following:
PartPOneVoiceTwo =  {
  \repeat volta 2 {
    \clef "treble_8" \key g \major \time 3/4 e,2. a,2. b,2. e,2. e,2.
    a,2. b,2. c4 \rest e,2
  }
  \repeat volta 2 {
    ^ "Fine" | % 9
    \key e \major e,2 a,4 e,2 a,4 e,2 fis4 <b, a dis'>2 r4 e,2 a,4
    e,2 <c ais>4 b,2 b,4 e4 e,2
  }
}
So delete the text ^ "Fine" after \repeat volta 2 {, and place it just after the previous note.
PartPOneVoiceTwo =  {
  \repeat volta 2 {
    \clef "treble_8" \key g \major \time 3/4 e,2. a,2. b,2. e,2. e,2.
    a,2. b,2. c4 \rest e,2 ^ "Fine"
  }
  \repeat volta 2 {
    | % 9
    \key e \major e,2 a,4 e,2 a,4 e,2 fis4 <b, a dis'>2 r4 e,2 a,4
    e,2 <c ais>4 b,2 b,4 e4 e,2
  }
}
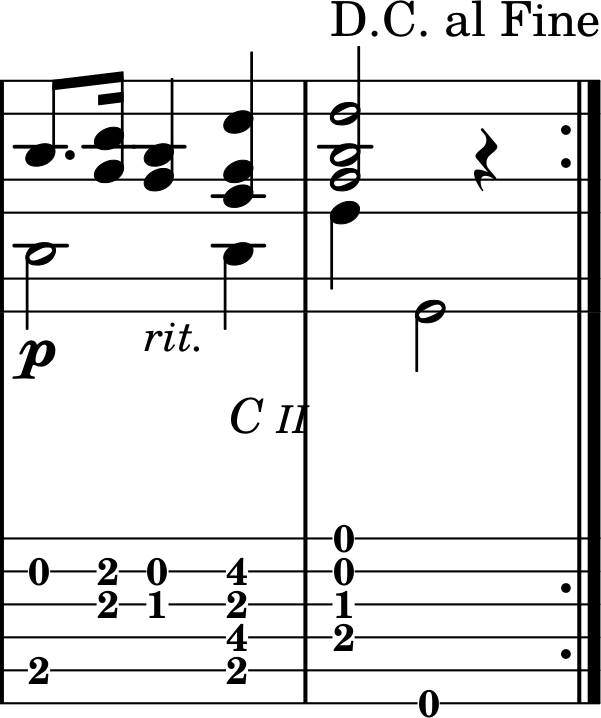
Now, let’s add the “D.C. al Fine”. To add it, we should go to the last measure of the variable PartPOneVoiceOne.
\stemUp <gis b e'>2 r4
Then, introduce the text ^ “D.C. al Fine” after the half notes and before the quarter rest.
\stemUp <gis b e'>2 ^ "D.C. al Fine" r4
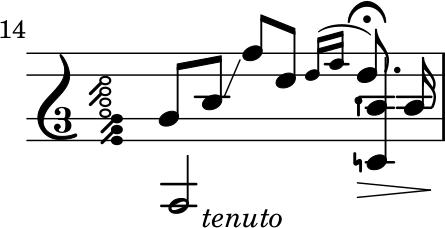
Repeated Fermatas
Look at the grace notes in measure 14. They both have a fermata, so let’s delete them.
Click on one of the fermata symbols to go to the corresponding LilyPond text (alternatively, you can search for the text ^\fermata with “Control” + “F”). You will find the following lines, for the variable PartPOneVoiceOne:
    [ dis'8 ] \acciaccatura { e'16 ^\fermata [ fis'16 ^\fermata ] }
    e'8. ^\fermata _\> ais16 | % 15
Just remove the first two fermatas (^\fermata).
    [ dis'8 ] \acciaccatura { e'16 [ fis'16 ] }
    e'8. ^\fermata _\> ais16 | % 15
Stem Directions
You can see that the notes of the bass voices have their stems upwards, when they should be downwards. To change this, click on the first note of the bass voice, in measure 1, to jump to the start of the variable PartPOneVoiceTwo.
PartPOneVoiceTwo =  {
  \repeat volta 2 {
    \clef "treble_8" \key e \minor \time 3/4 e,2. a,2. b,2. e,2. e,2.
    a,2. b,2. c4 \rest e,2
  }
To set the stem directions downwards, write \stemDown just before the first note.
PartPOneVoiceTwo =  {
  \repeat volta 2 {
    \clef "treble_8" \key e \minor \time 3/4
    \stemDown
    e,2. a,2. b,2. e,2. e,2.
    a,2. b,2. c4 \rest e,2
  }
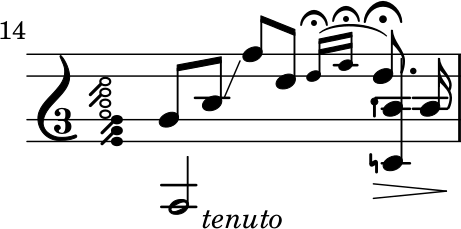
For this score this is enough to get all the stems pointing in the right direction. For example, you can see measure 14 corrected below.
Note Alignment
Look at measure 11.
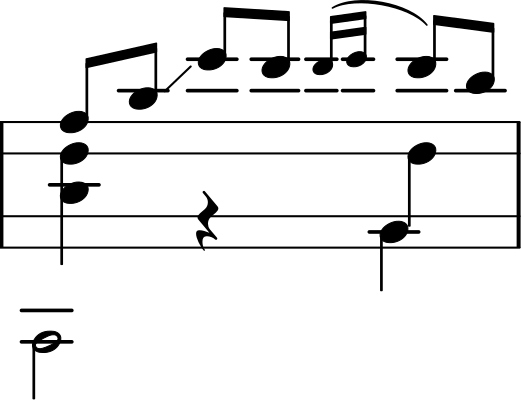
You can see that the bass notes are not aligned with the rest of the notes. This is something that happens by default in LilyPond when there are two notes from different voices with the same stem direction. If you want to remove this behavior, go to the beginning of the bass voice, and add the text \shiftOff just before the first note.
PartPOneVoiceTwo =  {
  \repeat volta 2 {
    \clef "treble_8" \key e \minor \time 3/4
    \stemDown \shiftOff
    e,2. a,2. b,2. e,2. e,2.
    a,2. b,2. c4 \rest e,2
  }
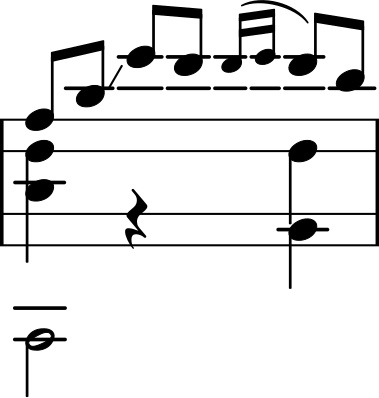
That way we have all the notes vertically aligned, as shown in the image below.
Rest Positions
Now, let’s improve the position of the rests a little bit. Unfortunately, for this piece we will have to manually specify the height of each rest, as the automatic positioning of the rests does not always work well with multiple voices in the same staff.
For example, let’s start with the vertical position of the half rests in measures 1-7.
They correspond to the variable PartPOneVoiceThree. Click on each of them to locate them in the LilyPond text (e2 \rest) and change their heights (for example, f2 \rest). You can change them all at once with “Edit” > “Replace” (“Control” + “H”). (This won’t work if there is a line break between e2 and \rest.)
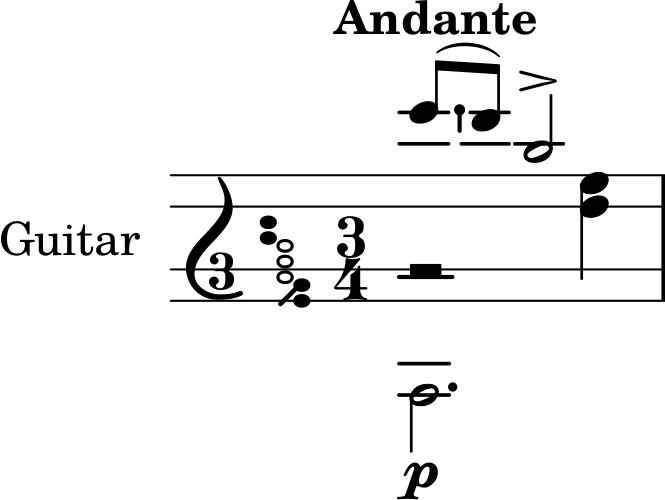
Now look at the quarter rest in measure 8.
That quarter rest should be in a lower position. Click on it to jump to the LilyPond text.
PartPOneVoiceTwo =  {
  \repeat volta 2 {
    \clef "treble_8" \key e \minor \time 3/4
    \stemDown \shiftOff
    e,2. a,2. b,2. e,2. e,2.
    a,2. b,2. c4 \rest e,2
  }
This corresponds to the bass voice, which is defined by the variable PartPOneVoiceTwo. We can try lowering the height of the rest one octave, that is, replacing c4 \rest for c,4 \rest.
PartPOneVoiceTwo =  {
  \repeat volta 2 {
    \clef "treble_8" \key e \minor \time 3/4
    \stemDown \shiftOff
    e,2. a,2. b,2. e,2. e,2.
    a,2. b,2. c,4 \rest e,2
  }
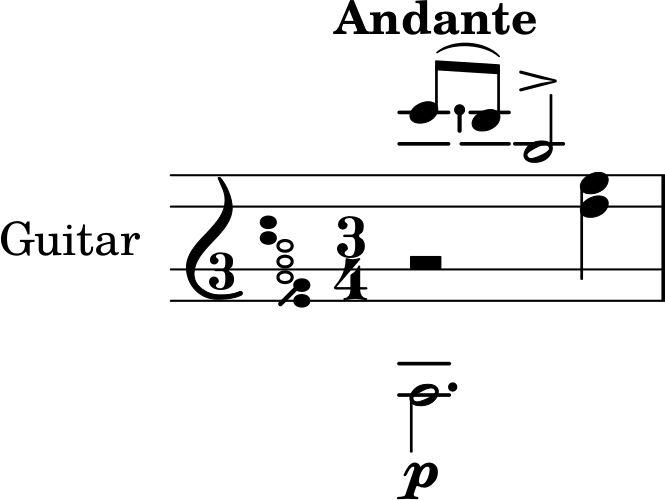
That is enough. Similarly, you can also lower the quarter rest located in measure 12, replacing the r4 with f,4 \rest, for example.
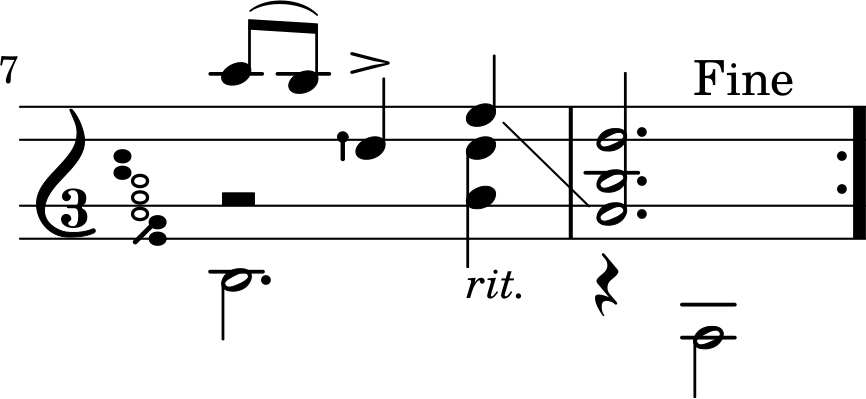
Incorrect Slide
Look back at measure 7. There is a slide between two G notes, but it is incorrect. The slide should end on the upper E note. Click on the E note to see the LilyPond text for those measures, corresponding to the variable PartPOneVoiceOne.
    c''8 ( [  b'8 ) ] dis'4 -> g'4 \glissando _\markup{
      \small\italic {rit.}
    } | % 8
    <g b e'>2.
  }
Here you can see that the final chord in measure 8 corresponds to the same voice. To make the slur (\glissando) end in the E, we have to move the other two notes (G and B) to the second bass voice, that is, to PartPOneVoiceThree. Therefore, first remove both notes from PartPOneVoiceOne.
    c''8 ( [  b'8 ) ] dis'4 -> g'4 \glissando _\markup{
      \small\italic {rit.}
    } | % 8
    e'2.
  }
Then, click on the last downward notes of measure 7 (A and D♯).
PartPOneVoiceThree =  {
  \repeat volta 2 {
    \clef "treble_8" \key e \minor \time 3/4 f2 \rest <e' g'>4 f2
    \rest <c' e'>4 f2 \rest <a dis'>4 s2. f2 \rest <e' g'>4 f2 \rest
    <c' e'>4 f2 \rest <a dis'>4 s2.
  }
Look at the last skip (s2.). You have to delete it and replace it by <g b>2.. Also, to make the stem direction upwards, write \stemUp before those notes, and write \stemDown after them.
PartPOneVoiceThree =  {
  \repeat volta 2 {
    \clef "treble_8" \key e \minor \time 3/4 f2 \rest <e' g'>4 f2
    \rest <c' e'>4 f2 \rest <a dis'>4 s2. f2 \rest <e' g'>4 f2 \rest
    <c' e'>4 f2 \rest <a dis'>4 \stemUp <g b>2. \stemDown
  }
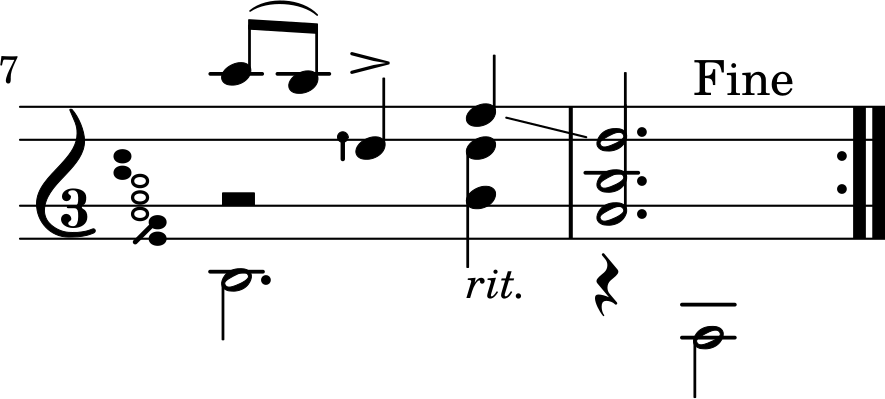
That’s it. This problem could have actually been avoided if in MuseScore we had assigned those two notes (G and B) to the second bass voice.
With all those changes, the score should be fine now. It should look like the screenshot below. However, we can still improve it a little bit, apart from adding the tablature.
Adding a Third Octave to the Staff
In Clairnote, we can add another pair of horizontal lines to the staff to get another octave for the bass notes, so that they won’t require ledger lines. In order to do so, go to the end of the LilyPond file, to the \score section.
\score {
  <<
    \new Staff
    <<
      \set Staff.instrumentName = "Guitar"
      \set Staff.shortInstrumentName = ""
Now, add the text \with {\cnStaffOctaveSpan 3} to the line \new Staff.
\score {
  <<
    \new Staff \with {\cnStaffOctaveSpan 3}
    <<
      \set Staff.instrumentName = "Guitar"
      \set Staff.shortInstrumentName = ""
With that change the staff should now span three octaves as shown below, making it easier to read the bass notes:
(See Software for documentation on how to create staves that span more than two octaves, and various other options provided by the clairnote.ly file.)
Adding the Tablature Staff
For adding the tablature, we need to change the structure of the variable \score just a bit.
\score {
  <<
    \new Staff \with {\cnStaffOctaveSpan 3}
    <<
      \set Staff.instrumentName = "Guitar"
      \set Staff.shortInstrumentName = ""
      \context Staff <<
        \mergeDifferentlyDottedOn\mergeDifferentlyHeadedOn
        \context Voice = "PartPOneVoiceOne" { \voiceOne \PartPOneVoiceOne }
        \context Voice = "PartPOneVoiceThree" { \voiceTwo \PartPOneVoiceThree }
        \context Voice = "PartPOneVoiceTwo" { \voiceThree \PartPOneVoiceTwo }
      >>
    >
  >>
  \layout {}
}
Right now, the score is defined as a staff with 3 octaves (\new Staff \with {\cnStaffOctaveSpan 3}) for guitar (\set Staff.instrumentName = "Guitar"), and this staff consists of three voices (PartPOneVoiceOne, PartPOneVoiceThree, and PartPOneVoiceTwo). Instead, we want a staff group (\new StaffGroup) composed by a regular staff (\new Staff) and a tablature staff (\new TabStaff), both with the same three voices (PartPOneVoiceOne, PartPOneVoiceThree, and PartPOneVoiceTwo). Plus, we will fill the subsection \layout with some variables to adjust graphical options. Here is the desired LilyPond text:
\score {
    <<
        \new StaffGroup = "Clairnote with tablature"
        <<
            \set StaffGroup.instrumentName = "Guitar"
            \new Staff = "guitar Clairnote"
            \with {\cnStaffOctaveSpan 3}
            <<
                \mergeDifferentlyDottedOn\mergeDifferentlyHeadedOn
                \clef "treble_8"
                \context Voice = "PartPOneVoiceOne" { \voiceOne \PartPOneVoiceOne }
                \context Voice = "PartPOneVoiceThree" { \voiceTwo \PartPOneVoiceThree }
                \context Voice = "PartPOneVoiceTwo" { \voiceThree \PartPOneVoiceTwo }
                >>
            \new TabStaff = "guitar tablature" <<
                \set Staff.stringTunings = \stringTuning <e, a, d g b e'>
                \override TextScript.font-series = #'sans
                \clef "tab"
                \context TabVoice = "PartPOneVoiceOne" { \voiceOne \PartPOneVoiceOne }
                \context TabVoice = "PartPOneVoiceThree" { \voiceTwo \PartPOneVoiceThree }
                \context TabVoice = "PartPOneVoiceTwo" { \voiceThree \PartPOneVoiceTwo }
                >>
            >>
        >>
  \layout {
    \context {
      \Score
      \override StaffGrouper.staff-staff-spacing.padding = 0.2\cm
      \omit Voice.StringNumber
    }
  }
}
As you can see, now we have a staff group that contains a Clairnote staff with 3 octaves and a tablature staff with the standard guitar tuning. In case you wanted to change the tuning of the guitar, you would just have to modify the notes between the brackets in the following line:
\set Staff.stringTunings = \stringTuning <e, a, d g b e'>
In the \layout subsection, the variable staff-staff-spacing.padding controls the distance between the Clairnote staff and the tablature staff, and the line \omit Voice.StringNumber prevents LilyPond from showing the string number of each note in the Clairnote staff (since we already have the tablature staff, the numbers are not needed).
Also, note that the lines \clef "treble_8" and \clef "tab" indicate the clef signs for both staves. In order to not have a contradiction with the lines \clef "treble_8" in the voices of the score (that were added there when the file was imported), we have to remove these lines from the LilyPond file (you can use “Control” + “F” to find them).
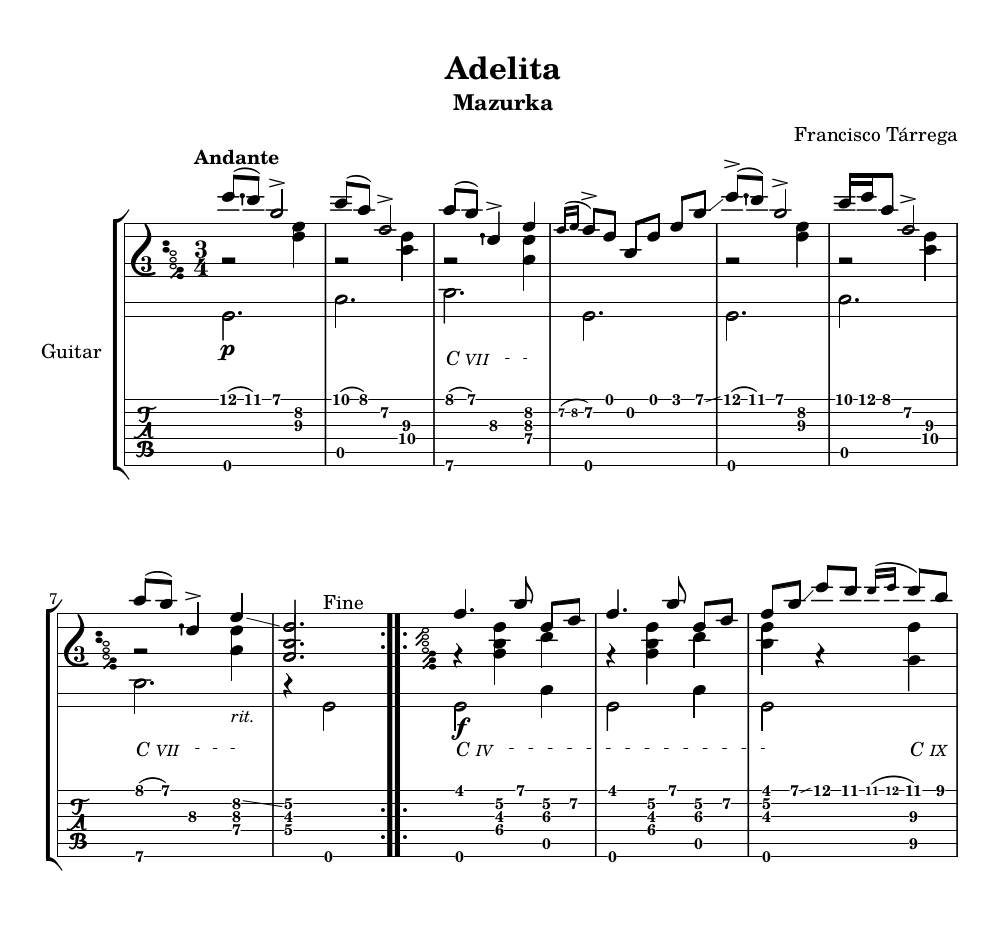
After that, we would have a score like the image below.

This looks nice, right? Now we have sheet music for guitar with tablature. However, the strings and fret numbers in the tablature have been chosen automatically by LilyPond and therefore they may not always be the correct ones.
(For more details see the LilyPond docs on Tablatures.)
Setting the Correct String for Each Note
To make changes, we will need to to edit all the wrong notes, in the variables PartPOneVoiceOne, PartPOneVoiceThree, and PartPOneVoiceTwo, and specify the number of the string where it must be played (1 to 6, from high to low). It is laborious work, but it is pretty simple. If we have a note, for example, e'4, and we want it to be played in the third string (G string), we should write e'4\3. In case we have two or more notes simultaneously, for example, <e' g>4, we would write <e'\3 g\2>4. To easily find the part of the LilyPond text that corresponds to each number in the tablature, you can just click on it. Alternatively, you can click on the corresponding note in the sheet music.
After doing all the needed changes, you would get a score like the image below.

Capo Texts
Remember that we deleted the capo texts so we could add them later? That is the last thing to do.
In general, we will add the texts to the main voice, that is, to the variable PartPOneVoiceOne. But before adding them, we should first change one property of the lines that go next to the texts. Go to the beginning of the variable PartPOneVoiceOne.
PartPOneVoiceOne =  {
  \repeat volta 2 {
    \key e \minor \time 3/4 | % 1
    \tempo "Andante"
    e''8 ( [ _\p dis''8 ) ] b'2 -> | % 2
    d''8 ( [ c''8 ) ] fis'2\2 -> | % 3
And add the following lines to the very beginning:
\override TextSpanner.bound-details.left.stencil-align-dir-y = #CENTER
\textSpannerDown
This will make the lines next to the capo texts vertically center-aligned with the text, and appear between the Clairnote staff and the tablature staff. So we would have the following text.
PartPOneVoiceOne =  {
  \override TextSpanner.bound-details.left.stencil-align-dir-y = #CENTER
  \textSpannerDown
  \repeat volta 2 {
    \key e \minor \time 3/4 | % 1
    \tempo "Andante"
    e''8 ( [ _\p dis''8 ) ] b'2 -> | % 2
    d''8 ( [ c''8 ) ] fis'2\2 -> | % 3
Now, let’s add a capo text to measure 3, which should be played with a capo on the fourth fret. The LilyPond text of the variable PartPOneVoiceOne for these measure is the following:
c''8 ( [ b'8 ) ] dis'4\3 -> g'4\2 |% 4
In order to declare the text to be written, we have to add the following line just before the previous one:
\override TextSpanner.bound-details.left.text = \markup{C\tiny{IV} " "}
The part on the right of the equal sign is the text that we want to show. We use the command \tiny{} to make the number of the capo smaller than the “C”, and then we add two spaces (" ") to separate the line from the text a little bit. Now, to set the start of the text, we have to write the line \tweak Y-offset -10 \startTextSpan just after the first note. The last command is self-explanatory, and the rest is used to place the text at a specific vertical position (you can change the -10 to change the position). Lastly, you have to add the command \stopTextSpan just after the last note that you want to include in the line of the capo text. Hence, you would have the following text:
    \override TextSpanner.bound-details.left.text = \markup{C\tiny{IV} "  "}
    c''8  \tweak Y-offset -10 \startTextSpan
   ( [  b'8 ) ] dis'4\3 -> g'4\2 \stopTextSpan |% 4
And you would get the result shown in the image below.

(Actually, \tweak Y-offset -10 \startTextSpan could be placed just before the first note that we want to cover with the capo text and line; however, that will cause a warning to appear in the LilyPond log. Although the score will still be rendered correctly, it’s generally better to avoid warnings in the log.)
Now, repeat these steps to add the remaining capo texts. In case you need to edit another voice to properly adjust the range of the text and line, remember to add to the beginning of the corresponding variable the lines \override TextSpanner.bound-details.left.stencil-align-dir-y = #CENTER and \textSpannerDown. By the way, in measure 12 you will have to change the position of the text to -11 to make it not overlap with the “rit.”.
Final Score
After all these edits, we have finished! Now don’t forget to uncomment the line \pointAndClickOff (delete the % at the start of the line), save the score, and render it. In the end, you should get a score similar to the following one.
Extra Tip: Arpeggios and Pluck Direction
In the last post we learned how to write arpeggio symbols that span notes from different voices and staffs. If we want to do the same here, we have to do something similar.
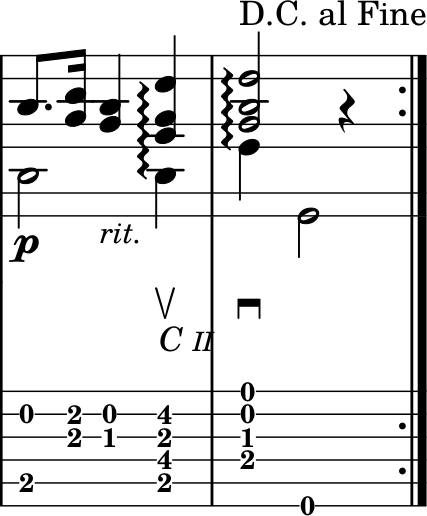
Imagine we want to play the last two chords of the piece as arpeggios.
We would just have to add the command \arpeggio to each note, for all the involved voices. For example, for the main voice (variable PartPOneVoiceOne) the text for the two measures would be:
  b8. [ _\! _\p <a cis'>16 ] <gis b>4 _\markup{
  \small\italic{rit.}}
  \once \override TextSpanner.bound-details.left.text = \markup{C\tiny{II} " "}
  \tweak Y-offset -10 \startTextSpan
  <fis a dis'>4 \arpeggio | \stopTextSpan % 16
  <gis b e'>2 \arpeggio ^ "D.C. al Fine" r4
If you do the same for the other voices (in this case, only PartPOneVoiceTwo), you obtain the following:
The single notes for the bass voice are not shown with an arpeggio line. To make the arpeggio include all the notes, you have to go to the section \score and add the line \consists "Span_arpeggio_engraver" connectArpeggios = ##t inside the brackets of \with {\cnStaffOctaveSpan 3} after \new Staff = "guitar traditional". The resulting text is displayed below.
\score {
    <<
        \new StaffGroup = "tab with traditional"
        <<
            \set StaffGroup.instrumentName = "Guitar"
            \new Staff = "guitar traditional"
            \with { \cnStaffOctaveSpan 3
                    \consists "Span_arpeggio_engraver"
                    connectArpeggios = ##t }
            <<
                \mergeDifferentlyDottedOn\mergeDifferentlyHeadedOn
                \clef "treble_8"
                \context Voice = "PartPOneVoiceOne" { \voiceOne \PartPOneVoiceOne }
                \context Voice = "PartPOneVoiceThree" { \voiceTwo \PartPOneVoiceThree }
                \context Voice = "PartPOneVoiceTwo" { \voiceThree \PartPOneVoiceTwo }
                >>
            \new TabStaff = "guitar tab"
            <<
                \set Staff.stringTunings = \stringTuning <e, a, d g b e'>
                \override TextScript.font-series = #'sans
                \clef "tab"
                \context TabVoice = "PartPOneVoiceOne" { \voiceOne \PartPOneVoiceOne }
                \context TabVoice = "PartPOneVoiceThree" { \voiceTwo \PartPOneVoiceThree }
                \context TabVoice = "PartPOneVoiceTwo" { \voiceThree \PartPOneVoiceTwo }
                >>
            >>
        >>
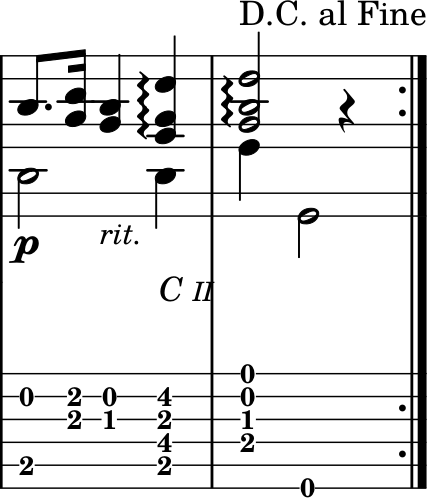
As you can see below, with these edits we get the desired result.

Now, imagine we wanted to specify the pluck direction of the chords. This can be done using the commands \downbow and \upbow, that will display downbow and upbow symbols (downbow means from low to high notes, while upbow means from high to low notes). But, in order to show them all with the same vertical position (independently of the position of the note next to where we put the commands) we have to add the text \tweak Y-offset #-12, where the number indicates the desired position. For example, if we put them in the bass voice (PartPOneVoiceTwo), the LilyPond text for the two last measures would be the following:
    b,2 b,4 \arpeggio \tweak Y-offset #-12 _\upbow e4 \arpeggio
    \tweak Y-offset #-12 _\downbow e,2
And the result would be the image below.
(For more details see the LilyPond docs on Apreggios.)
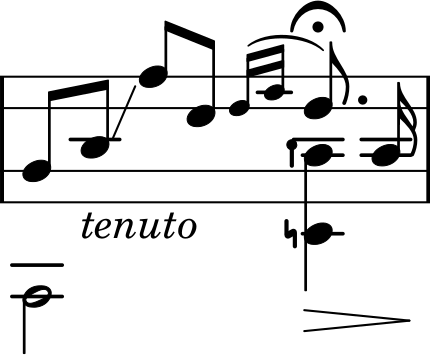
Extra Tip: Shared Notes Between Voices
Lastly, imagine the following alternate ending for this piece.
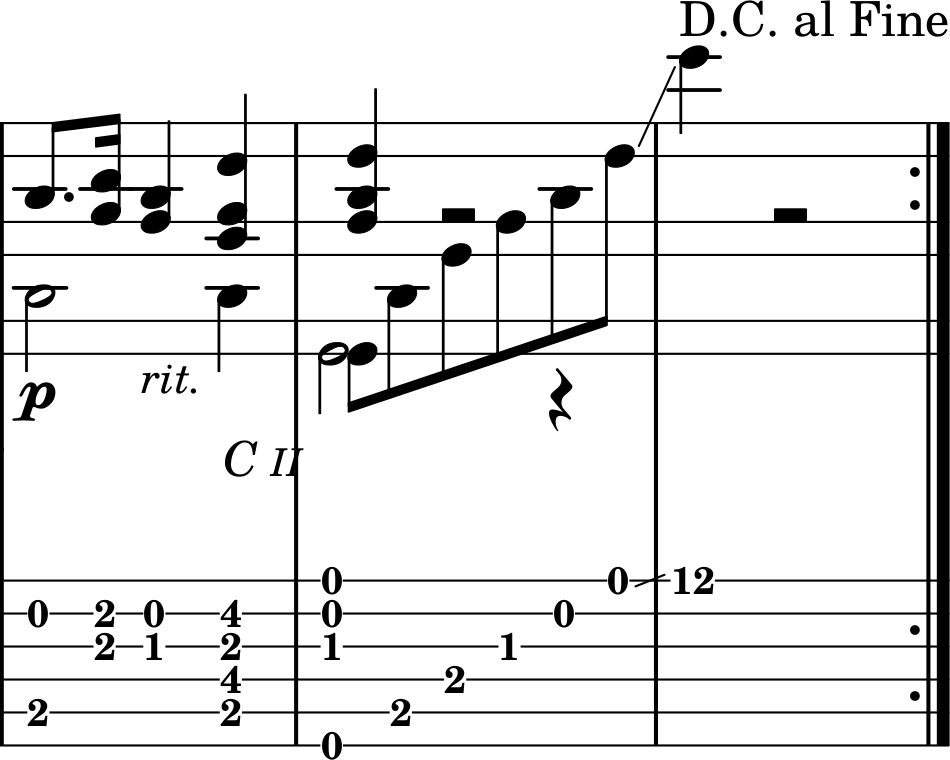
Here we have an extended arpeggio starting with the same note as the bass voice (the half E). This looks a little weird, doesn’t it? It would be better if we could merge the two E notes into one, which is a common practice in guitar scores.
We will use a trick to address this. Let’s consider the LilyPond text for the intermediate voice (PartPOneVoiceThree) and for the bass voice (PartPOneVoiceTwo), respectively:
e,8 [ b,8 e8 gis8 b8 e'8 ] \glissando e''4 s2

b,2 b,4 e,2 e,,,4 \rest s2.
Before the first eighth note of the intermediate voice, we have to add the text \tweak duration-log #1. This will modify the notehead as if the note had the duration specified with the number (0 is a whole note, 1 is a half note, 2 is a quarter note, etc.).
As the two notes that we want to merge have the same stem direction, this is the only action needed.
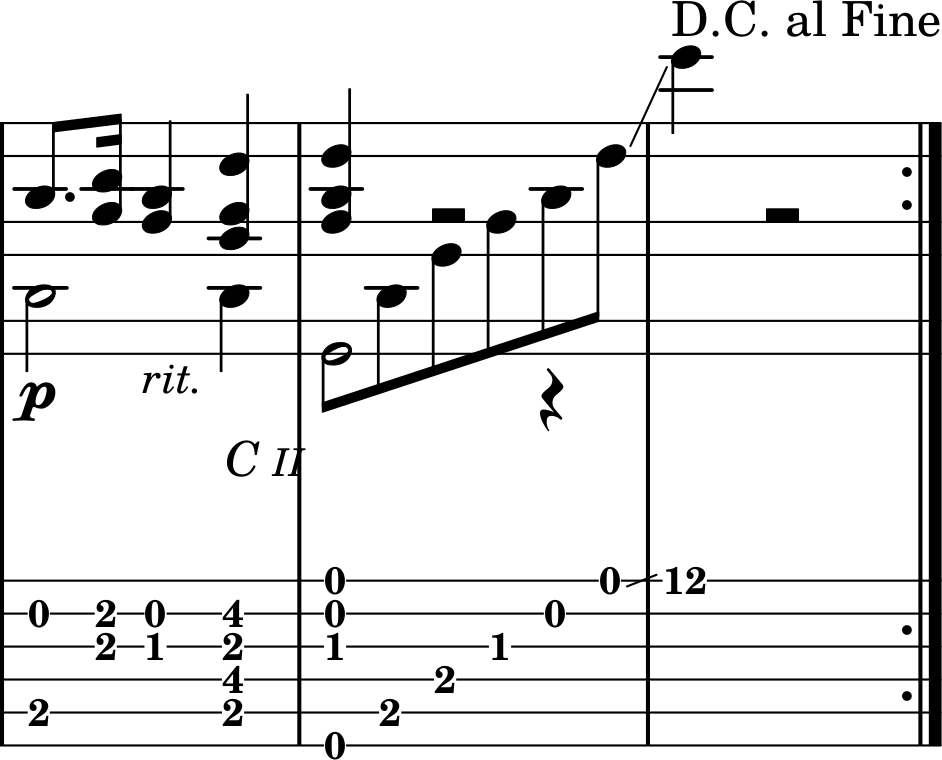
That is, the new text for both the intermediate and the bass voice would be, respectively:
\tweak duration-log #1 e,8 [ b,8 e8 gis8 b8 e'8 ] \glissando e''4 s2

b,2 b,4 e,2 e,,,4 \rest s2.
Note that the first voice (PartPOneVoiceOne) should not be changed. Then we will get the desired behavior.
If this did not work in your case, you could also replace one of the notes with the larger duration with a skip (s), or also surround the note between the commands \hideNotes and \unHideNotes.
And that is all for this post! We have learned how to write guitar scores with tablatures, how to add a third octave to the Clairnote staff and how to specify the strings and frets for each note in the tablature part, among other things.
Here are the final files for Tárrega’s Adelita:
And the files before we changed them:
- Adelita - MusicXML file exported from MuseScore
- Adelita - LilyPond file after conversion from the MusicXML file
As always, here are some links for the software we used: